Rail Lighting Explained: Illuminate Your Space with Style
May 29, 2025
Everything You Need to Know About LED Recessed Luminaires
June 3, 2025Illuminate Your Space with Crystal Elegance
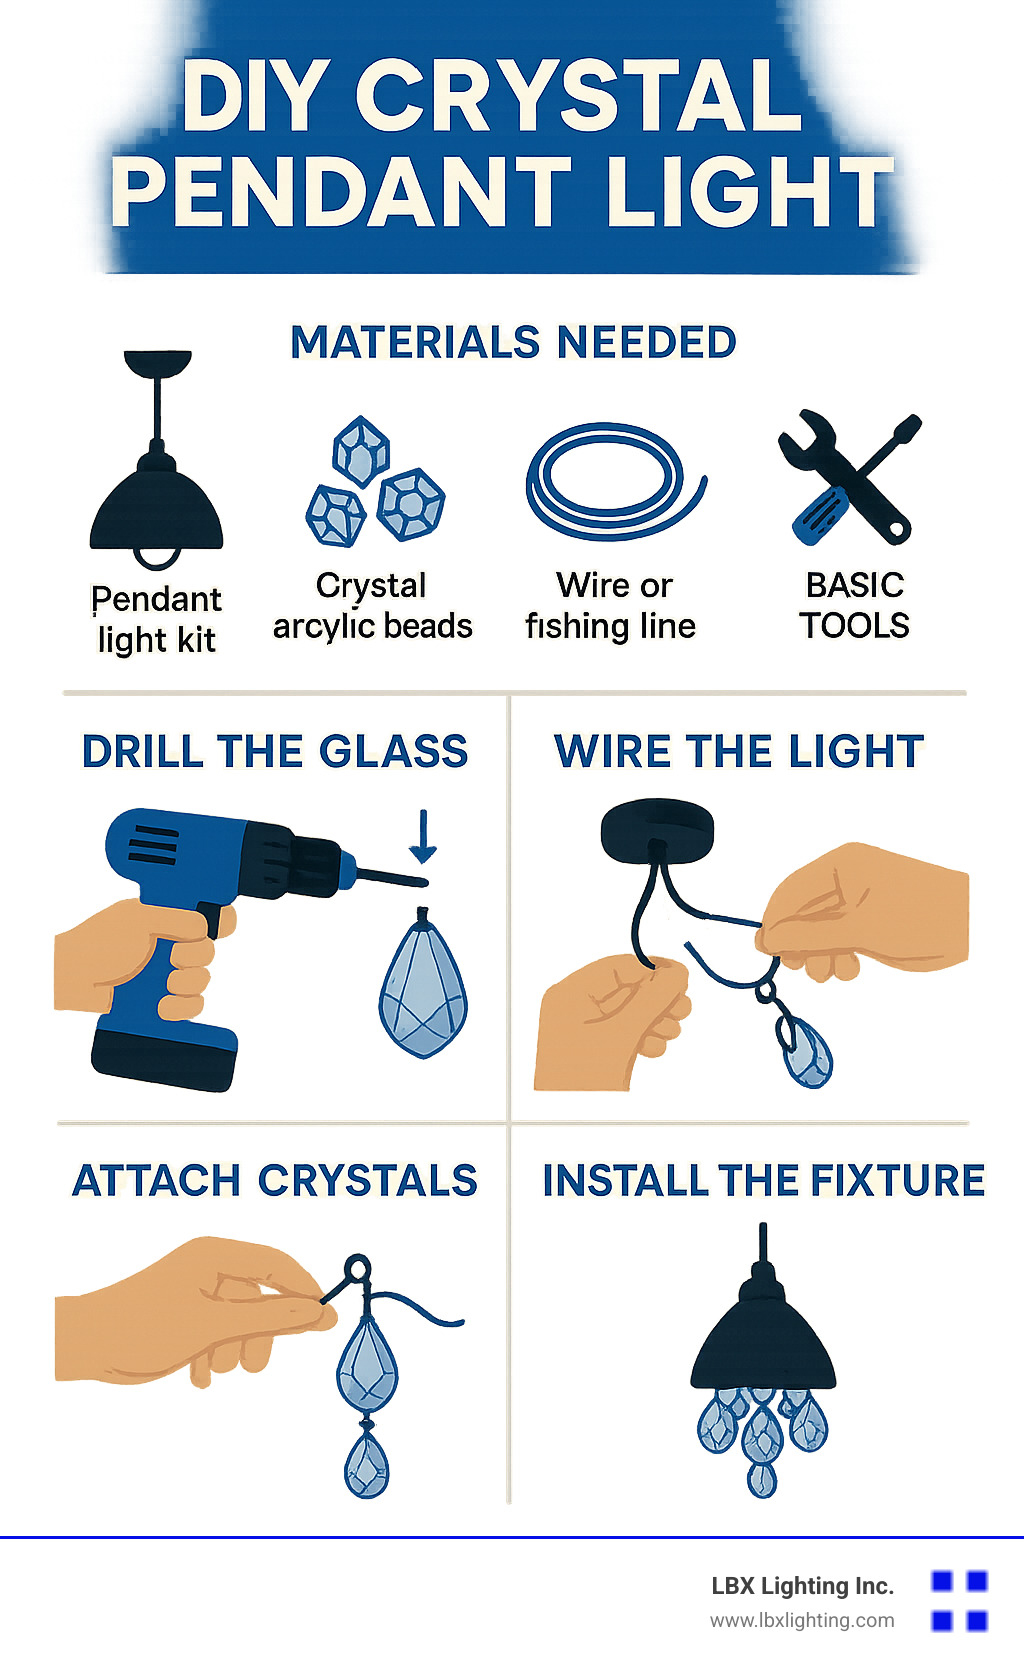
If you’re looking to create a diy crystal pendant light, here’s what you need to know:
- Materials needed: Pendant light kit, crystal/acrylic beads, wire or fishing line, and basic tools
- Budget: DIY crystal pendant lights cost $26-60 vs. $150-1500 for store-bought versions
- Time required: 2-3 days including drying time
- Difficulty level: Moderate (requires basic wiring knowledge)
- Key benefits: Customizable design, significant cost savings, and unique statement piece
A diy crystal pendant light transforms any room with elegance and sparkle while saving you hundreds of dollars compared to designer fixtures. These stunning lighting projects have become increasingly popular as homeowners find how accessible luxury lighting can be with just a few basic materials and some creativity. Crystal pendant lights dominated the market in 2022, holding more than one-third of the global chandelier market revenue—and for good reason.
When properly maintained, crystal pendant lights preserve their brilliance for many years, making them a lasting investment in your home decor. Whether you’re upcycling old chandelier crystals or creating something entirely new, the process is both rewarding and economical.
“I love custom lighting, don’t you? Like love love love it,” as one DIY enthusiast put it. That passion for personalized lighting is what drives many homeowners to create their own crystal fixtures.
I’m Michael Eftekhar, and with over 30 years of experience at LBX Lighting, I’ve guided countless customers through creating their own diy crystal pendant light projects, helping them transform ordinary spaces into extraordinary ones with the perfect balance of elegance and craftsmanship.
Diy crystal pendant light terms to remember:
– crystal ceiling lamp
– crystal chandelier pendant light
Why Crystal Pendant Lights Keep Trending
Crystal pendant lights have a fascinating history that stretches back centuries, from the grand chandeliers of royal palaces to the sleek, modern designs gracing today’s homes. There’s something timeless about these fixtures that continues to captivate homeowners and designers alike.
The numbers tell an impressive story: in 2022, crystal chandeliers and pendant lights dominated the global lighting market, claiming more than one-third of total revenue. This isn’t just a passing trend – it’s a lasting love affair between homeowners and these dazzling fixtures.
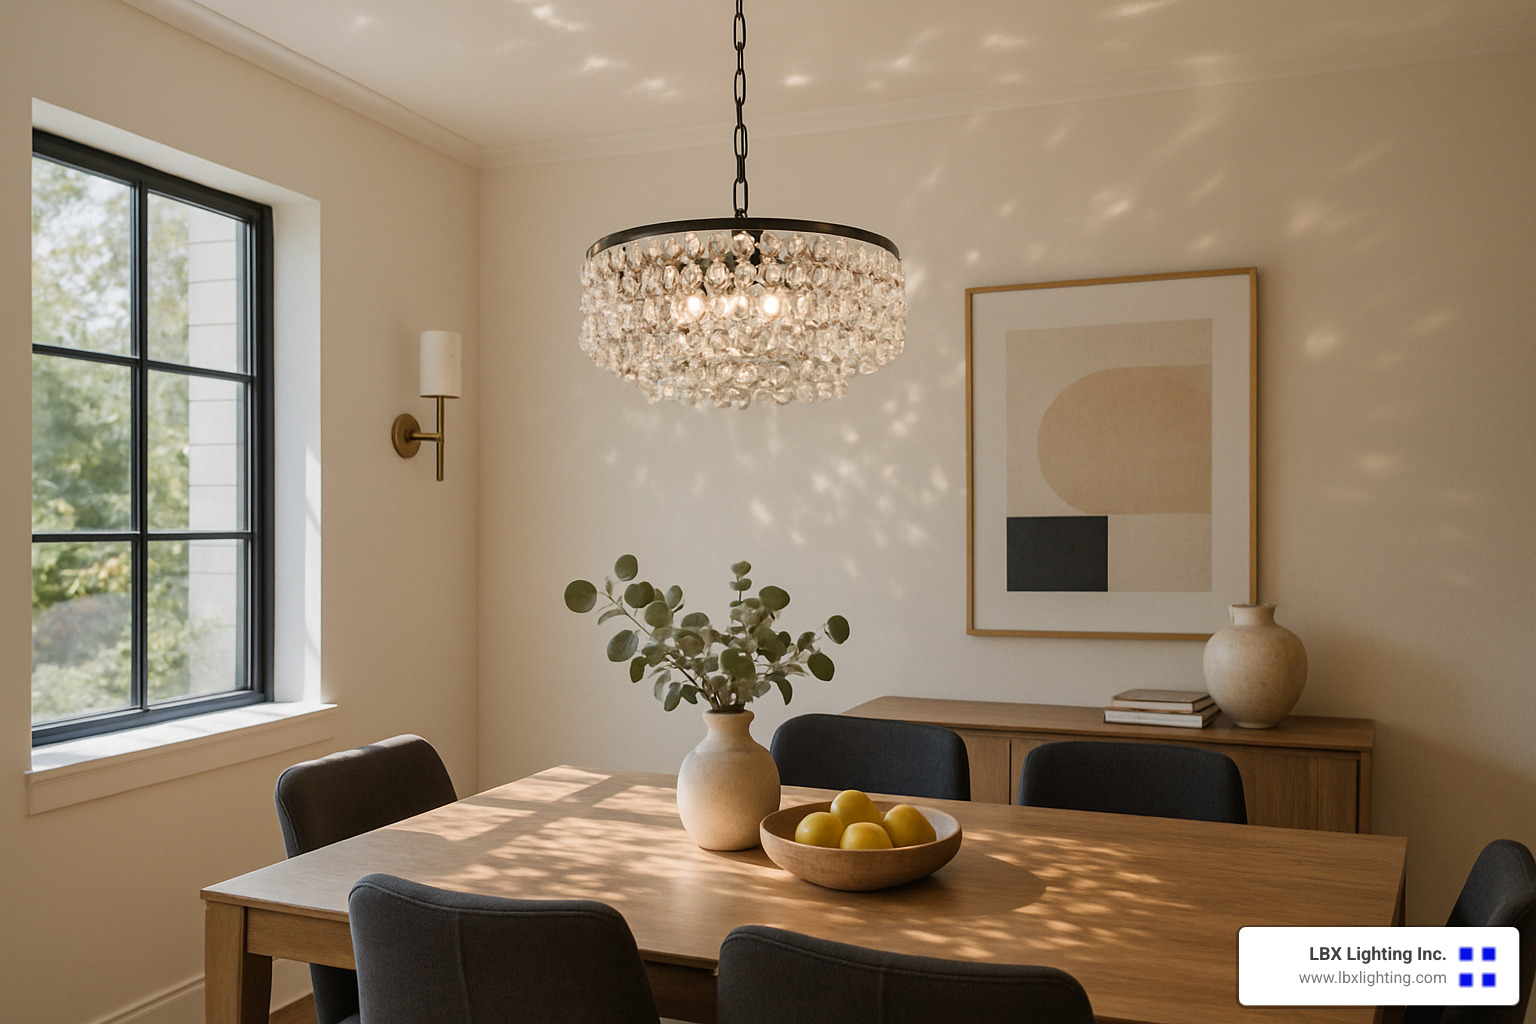
What makes crystal pendants truly magical is their unique ability to transform light. Unlike ordinary fixtures that simply illuminate a space, diy crystal pendant light creations refract light into stunning rainbow prisms that dance across your walls and ceiling. This enchanting light-play turns everyday rooms into extraordinary spaces, especially during evening hours when the effect is most dramatic.
Today’s crystal pendant trends blend tradition with fresh approaches:
Minimalist revival designs feature clean lines with strategic crystal placement, proving that sometimes less truly is more. Mixed materials are gaining popularity too, with designers combining crystals alongside wood, metal, or fabric for textural contrast. The vintage comeback is in full swing, with updated takes on classic crystal designs that honor tradition while feeling fresh and current. Cluster designs group multiple small pendants together, creating a more dramatic statement than a single fixture could achieve.
The shift to energy-efficient LEDs has been a game-changer for crystal lighting. These cooler-running bulbs allow for more creative, intricate designs while maintaining the brilliant sparkle that makes crystal fixtures so desirable. Plus, they create that cozy, romantic ambience that makes crystal pendants perfect for dining rooms, bedrooms, and living spaces alike.
Advantages for Home Décor
Adding a diy crystal pendant light to your home brings benefits that go far beyond basic illumination:
They create an instant wow-factor – even a modest crystal fixture becomes an immediate focal point that draws the eye and sparks conversation. The prismatic rainbows they cast transform ordinary walls into canvases of dancing light. Quality lighting fixtures can actually increase your resale value, with potential buyers often willing to pay more for homes with distinctive lighting features.
Crystal pendants also offer exceptional lifespan – when properly maintained, these fixtures can last for generations, making them heirlooms rather than temporary decorations. Perhaps most appealing for DIY enthusiasts is the budget DIY savings – creating your own crystal pendant can save $100 or more compared to store-bought options.
As one of our customers shared after completing her diy crystal pendant light: “I’m amazed at how something I made myself could look so expensive and transform my entire dining room!” This sentiment echoes what we hear regularly at LBX Lighting – that achieving high-end, luxurious lighting is within reach of any determined DIYer.
The versatility of crystal pendants means they work beautifully across different rooms and design styles. Whether illuminating a kitchen island, creating a romantic bedroom atmosphere, or adding elegance to an entryway, these fixtures adapt to your space while maintaining their timeless appeal.
Gathering Materials & Tools for Your diy crystal pendant light
Ready to create some sparkle in your home? Before you dive into crafting your diy crystal pendant light, let’s talk about what you’ll need. The good news is that this project won’t break the bank—most DIYers spend between $26 and $60 depending on their design choices. Compare that to store-bought crystal fixtures that can run anywhere from $150 to a whopping $1500!
Essential Materials:
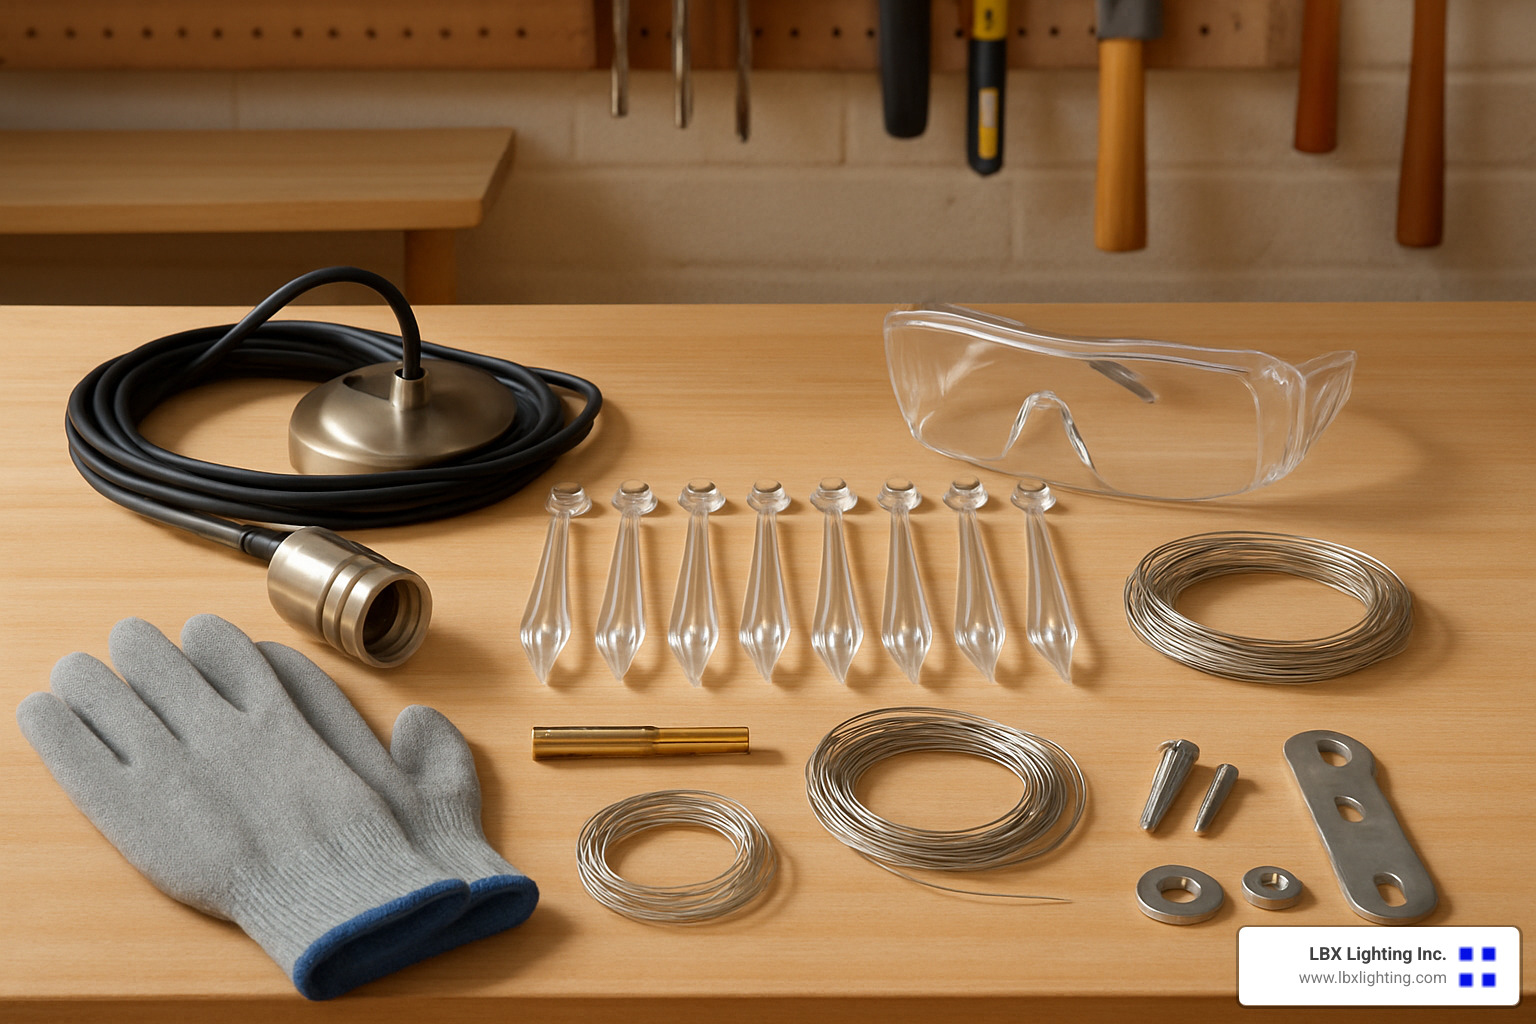
I always tell my customers at LBX Lighting that preparation is half the battle. For your crystal pendant project, you’ll need a pendant light kit or repurposed shade holder as your base. Then comes the fun part—choosing your crystals! You can go with genuine crystal prisms (either salvaged or new), budget-friendly acrylic crystal garland (about $13 for 30 feet), or glass beads with pre-drilled holes.
Don’t forget the wiring components: a pendant light cord kit with socket, ceiling canopy, and decorative chain or cord. For mounting, you’ll need a swag hook (if you’re not hardwiring) and appropriate ceiling anchors. To connect everything beautifully, grab some fine-gauge wire, fishing line for invisible connections, and small eye hooks or jump rings.
As for tools, safety first! For working with glass or crystal, you’ll need a diamond glass drill bit (½” works well), safety goggles, gloves, and masking tape. Basic wiring tools include wire cutters/strippers, a screwdriver set, and pliers. And for assembly, have your measuring tape, level, and drill with appropriate bits ready to go.
Sourcing & Upcycling Tips
One of my favorite parts about helping customers with their diy crystal pendant light projects is sharing creative sourcing ideas. Here at LBX Lighting, we’re big believers in both saving money and being kind to the environment.
Thrift stores are treasure troves for old chandeliers—even damaged ones can be dismantled for their beautiful crystals. Habitat for Humanity ReStore locations often have lighting fixtures at a fraction of retail cost. Don’t overlook estate sales, where vintage crystal fixtures sometimes sell for surprisingly low prices.
Online marketplaces are great for finding specific parts—just search for “chandelier parts” or “crystal prisms.” And don’t forget craft stores for acrylic alternatives and assembly supplies.
I recently helped a customer who told me, “I had three chandeliers’ worth of crystals and made Christmas ornaments that were lovely and sparkly.” That same creative spirit works wonderfully for pendant lights!
Before you rush out shopping, take a look around your home. You might already have items that could be repurposed: glass bowls or vases, decorative tea light holders, wire baskets, or parts from old lamps.
For quality new chandelier crystals and personalized advice, you’re always welcome to visit us at LBX Lighting’s Chandelier Light Fixture services in Houston. Our team loves helping DIYers select the perfect components for their projects—we might even have some special tips to share that aren’t in any manual!
Step-By-Step Build: diy crystal pendant light From Scratch
Rolling up your sleeves to create your own diy crystal pendant light is one of the most satisfying home projects you can tackle. Don’t worry if you’ve never done anything like this before—I’ll walk you through each step with the care and attention I’d give a friend.
1. Prep & Drill the Shade
The first challenge is often creating that perfect hole in your glass shade. I remember my first time drilling glass—I was terrified I’d crack my beautiful thrift store find!
Start by laying your glass shade on a soft towel to prevent it from rolling around. Make a small X with masking tape exactly where you want your hole. This simple step prevents your drill bit from skating across the slippery surface.
Pro tip: Keep a spray bottle of water handy! Spritz the drilling area frequently to cool the diamond bit and prevent overheating that could crack your glass.
Begin drilling at a 45° angle to create a small dimple, then gradually straighten to 90° as you continue. Apply gentle, consistent pressure—let the drill do the work. When you feel the bit break through, ease up on the pressure to avoid chipping the inside edge.
“I learned the hard way to drill BEFORE painting,” shared one of our customers at LBX Lighting. “Had to start all over when my drill cracked my freshly painted shade!”
For a visual guide that’s been helpful to many DIYers, check out this detailed drill through glass tutorial.
2. Wire the Socket & Cord
Now for the electrical part—which sounds scarier than it actually is! Safety is paramount here, so if you’re unsure, there’s absolutely no shame in consulting an electrician.
After threading your cord through the drilled hole, you’ll need to prepare the wires. Gently split the end of the cord and strip about half an inch of insulation from each wire. Feel the cord with your fingers—the neutral wire typically has small ridges or texture, while the hot wire feels smooth.
Connect these wires to the socket by wrapping them clockwise around the appropriate screws (neutral to silver, hot to brass) and tightening securely. Don’t forget to tie a simple knot in the cord inside the socket housing—this acts as a strain relief to prevent tugging on your connections.
“If your light doesn’t work when you test it, don’t panic,” says Michael from our team at LBX Lighting. “Just switch the wires on the screws. Even pros sometimes mix up which is which!”
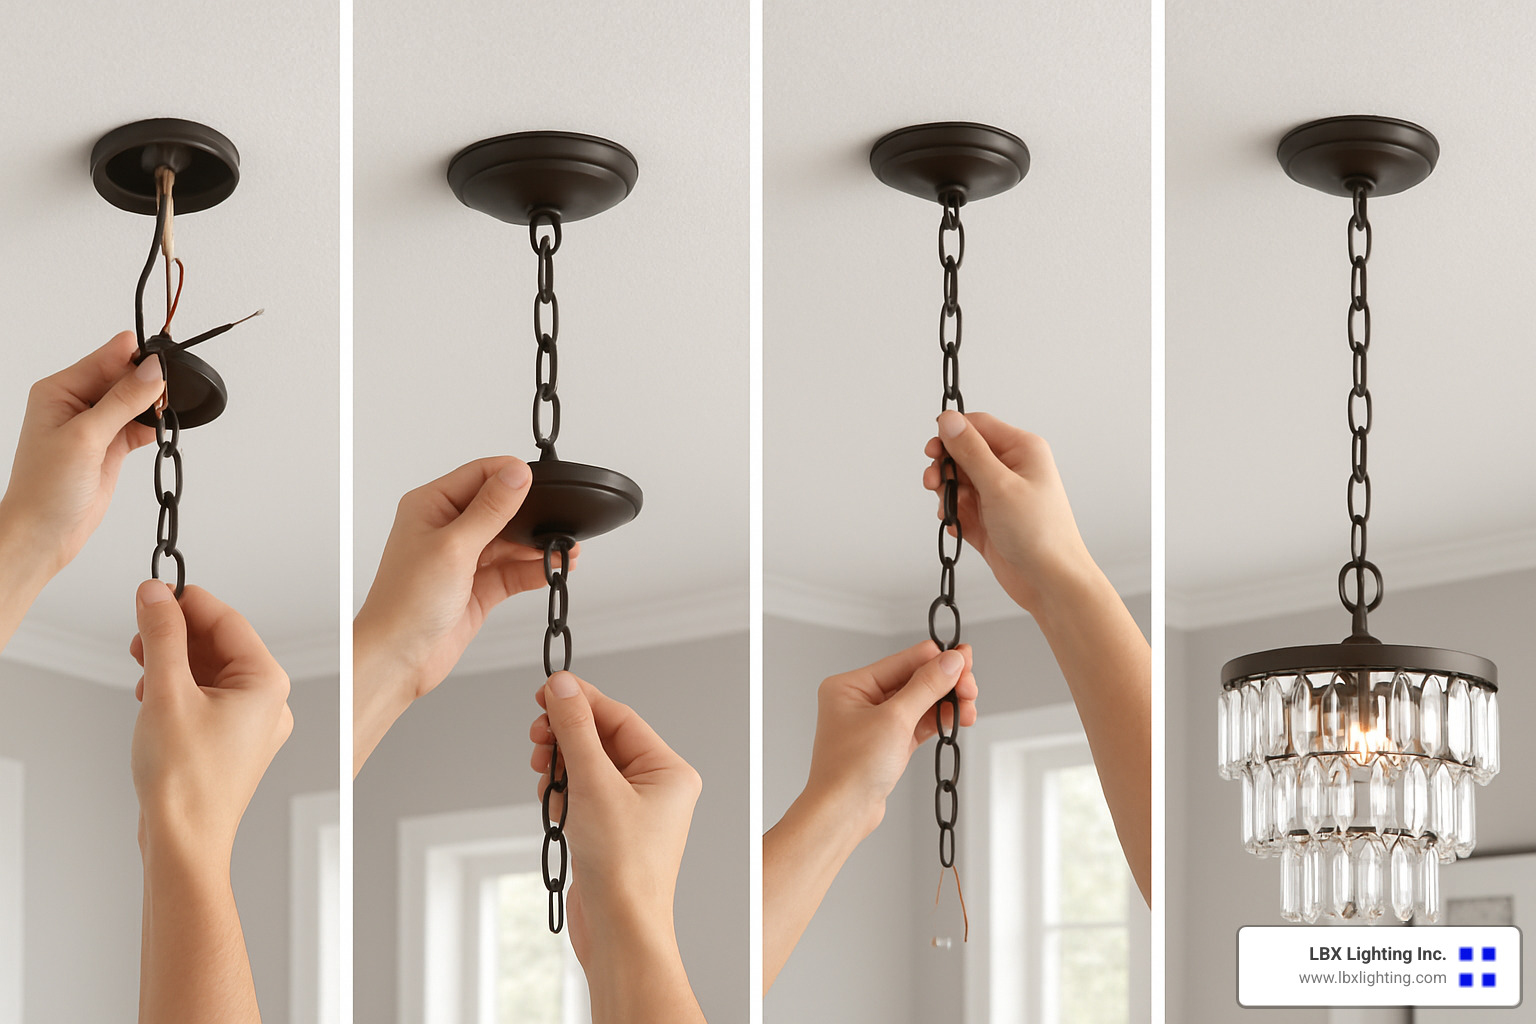
3. Hang Hardware & Balance Weight
The secret to a professional-looking diy crystal pendant light is making sure it hangs straight and at the perfect height. For dining tables, aim for 30-36 inches above the surface—this provides ideal illumination without blocking conversation.
When installing your ceiling mount, always try to anchor into a ceiling joist for maximum support. If that’s not possible, use toggle bolts or other heavy-duty anchors—remember, crystals add significant weight over time.
Thread your cord through the chain links for a clean, professional appearance. I love using needle-nose pliers to open and close chain links rather than cutting them—this preserves your ability to adjust the height later if needed.
Take a step back and use a level to check that your fixture hangs straight. Nothing gives away a DIY project faster than a crooked pendant!
4. Add Crystals & Customize Layout
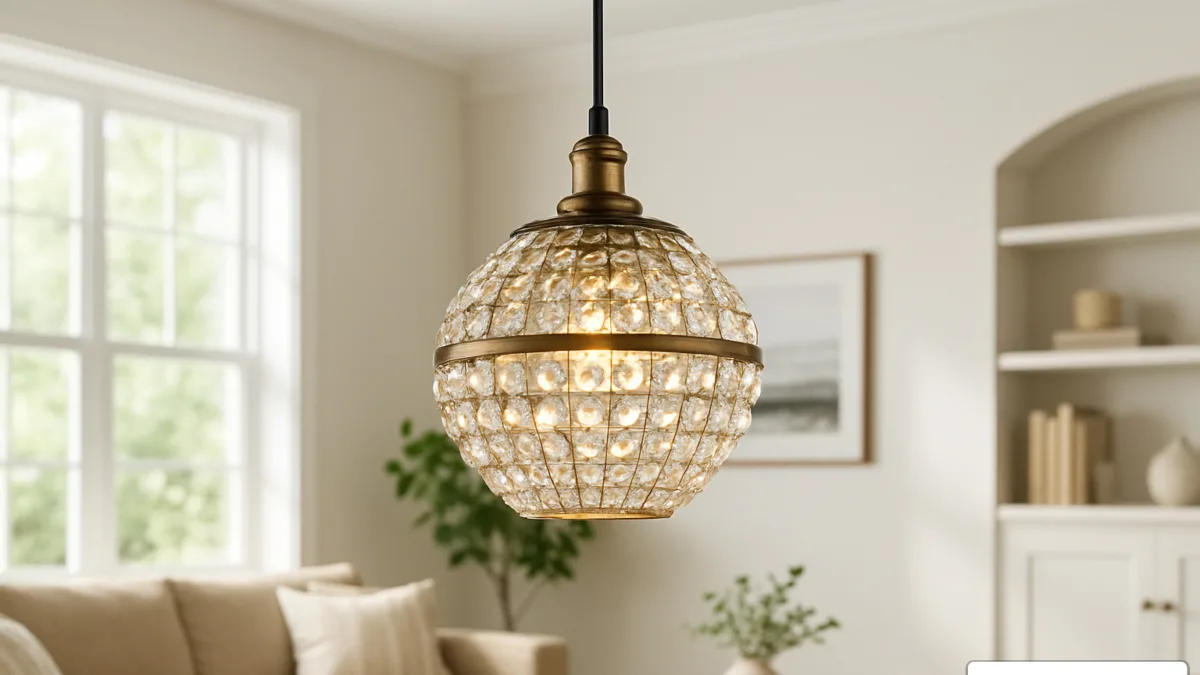
Here comes the fun part—where your diy crystal pendant light truly becomes yours! There are countless ways to arrange your crystals, from neat single-tier designs to dramatic cascading waterfalls.
Before attaching a single crystal, sketch your design on paper. This simple step has saved many of our customers from “design regret” halfway through the process.
When working with crystal strands, I recommend starting from the center and working outward in a spiral pattern. This helps maintain balance and symmetry as you go. Secure each strand with fine gauge wire or fishing line (fishing line is nearly invisible but slightly less secure).
Some of my favorite arrangements include:
Raindrop cascade – Varying lengths of crystal strands create a natural, flowing waterfall effect that catches light beautifully.
Cluster ball – Perfect for maximizing sparkle, this dense arrangement creates impressive light play throughout your room.
Geometric grid – For modern spaces, try a structured pattern that complements clean lines and contemporary décor.
“I was amazed at how different my pendant looked in daylight versus evening,” shared a customer who created a stunning diy crystal pendant light for her entryway. “It’s like having two different fixtures!”
For wonderful inspiration that’s helped many of our customers, take a look at this Crystal Ball Chandelier inspiration.
There’s no wrong way to design your crystal arrangement—the beauty of DIY is creating something that perfectly matches your vision. And if you need more guidance or want to see examples in person, stop by our showroom at LBX Lighting in Houston. We love helping fellow lighting enthusiasts bring their sparkly dreams to life!
Personalization, Safety & Maintenance
Your diy crystal pendant light can be further customized to match your unique style. Here are some ideas from our LBX Lighting design team:
- Color-dipped crystals: Use glass paint to add subtle color to crystal tips
- Mixed materials: Incorporate wooden beads, metal accents, or fabric elements
- Metallic finishes: Spray paint metal components in gold, bronze, or matte black
- LED options: Use color-changing LED bulbs for versatile lighting moods
Safety Considerations
Safety should never be compromised in DIY lighting projects:
- Always use UL-rated electrical components
- Turn off power at the breaker before installation
- Ensure your ceiling can support the weight of your fixture
- Keep heat-sensitive crystals away from high-wattage bulbs
- Consider LED bulbs for cooler operation
- Have your work inspected by a professional if you’re uncertain
Maintenance Tips
To keep your diy crystal pendant light sparkling for years to come:
- Dust weekly with a soft microfiber cloth
- Deep clean monthly using a 50/50 mixture of water and white vinegar
- Never use ammonia-based cleaners on crystals
- Turn off the light and allow to cool completely before cleaning
- Handle crystals by their metal components to avoid fingerprints
For more detailed guidance, visit our guide on How to Clean Swarovski Crystal Chandeliers.
Common Mistakes to Avoid
Based on our experience at LBX Lighting, here are the most common pitfalls:
- Drilling too large a hole in glass (1/2″ is typically sufficient)
- Overloading the fixture with too many heavy crystals
- Uneven weight distribution causing the fixture to hang crookedly
- Inadequate ceiling support for heavier fixtures
- Improper wiring leading to shorts or safety hazards
Room-by-Room Placement Guide
Different spaces require different approaches to pendant lighting:
- Kitchen Island: Hang pendants 30-36″ above the counter, spaced evenly
- Dining Table: Center a single pendant or group multiple small ones, 30-34″ above table
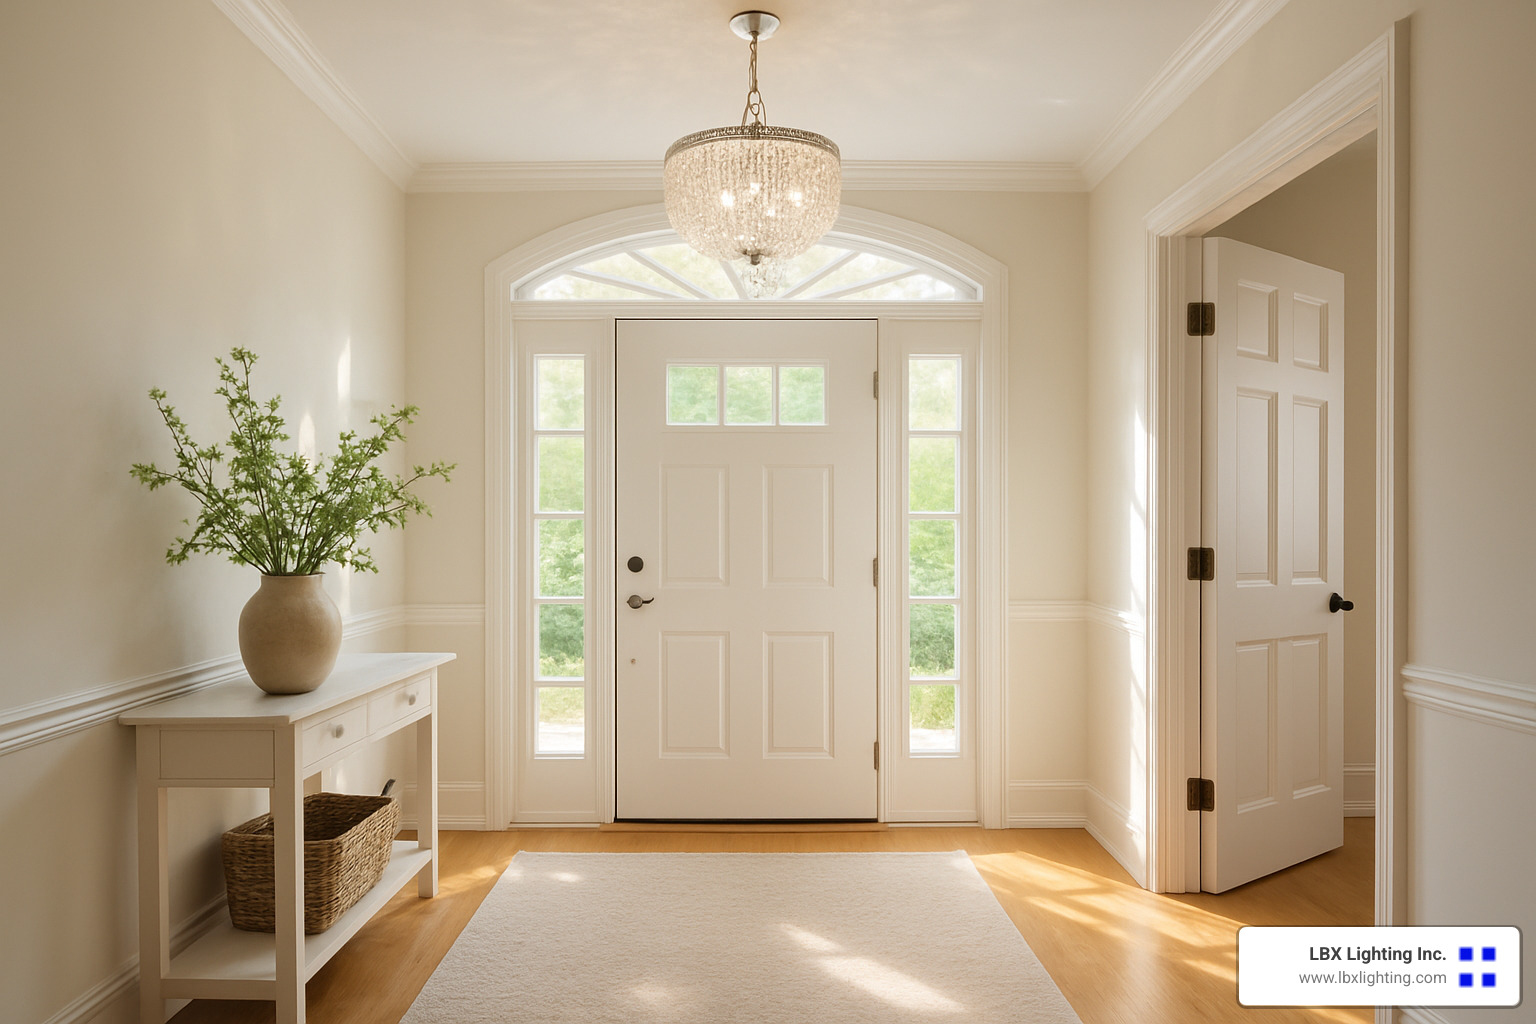
- Entryway: For dramatic effect, hang lower in two-story foyers (at least 7′ from floor)
- Bedroom: Hang bedside pendants 16-18″ from the wall at reading height
- Bathroom: Choose moisture-resistant fixtures and follow code requirements for wet locations
As we tell our Houston customers at LBX Lighting, the right placement improves both the beauty and functionality of your diy crystal pendant light.
Frequently Asked Questions about diy crystal pendant light
What tools do I need if I’ve never wired a light before?
Tackling your first diy crystal pendant light project might feel intimidating, especially the electrical part. Don’t worry! You only need a few basic tools to get started:
For beginners, I always recommend starting with a pre-wired pendant kit—they take most of the guesswork out of the electrical components. You’ll still need some basic tools: wire strippers to expose the copper wiring, both flathead and Phillips screwdrivers for various connections, electrical tape for safety, and a voltage tester (this $10 tool can literally save your life by confirming the power is truly off).
At LBX Lighting, we’ve helped countless first-time DIYers through this process. If you’re feeling nervous about the electrical work, there’s no shame in handling the creative parts yourself and calling an electrician for the final installation. Safety always comes first with electrical projects!
How do I drill a hole in glass without breaking it?
This is probably the most nerve-wracking part of creating a diy crystal pendant light! I’ve seen many beautiful glass pieces sacrificed to improper drilling techniques, but it’s actually quite manageable with the right approach.
The secret lies in using a diamond-tipped glass drill bit—regular bits simply won’t cut it and will likely crack your glass. Keep the bit constantly cooled with water during drilling (a spray bottle works well), and start at a 45° angle to create what we call a “starter dimple” before gradually moving to 90°. Use very light pressure throughout—let the bit do the work rather than forcing it.
One of our customers shared a brilliant tip: “I place a folded towel under my glass bowl to cushion the edges and prevent vibration.” Another good practice is to test your technique on a similar piece of scrap glass first if you have one available. Patience is truly key here—this is definitely not a step to rush through while creating your diy crystal pendant light.
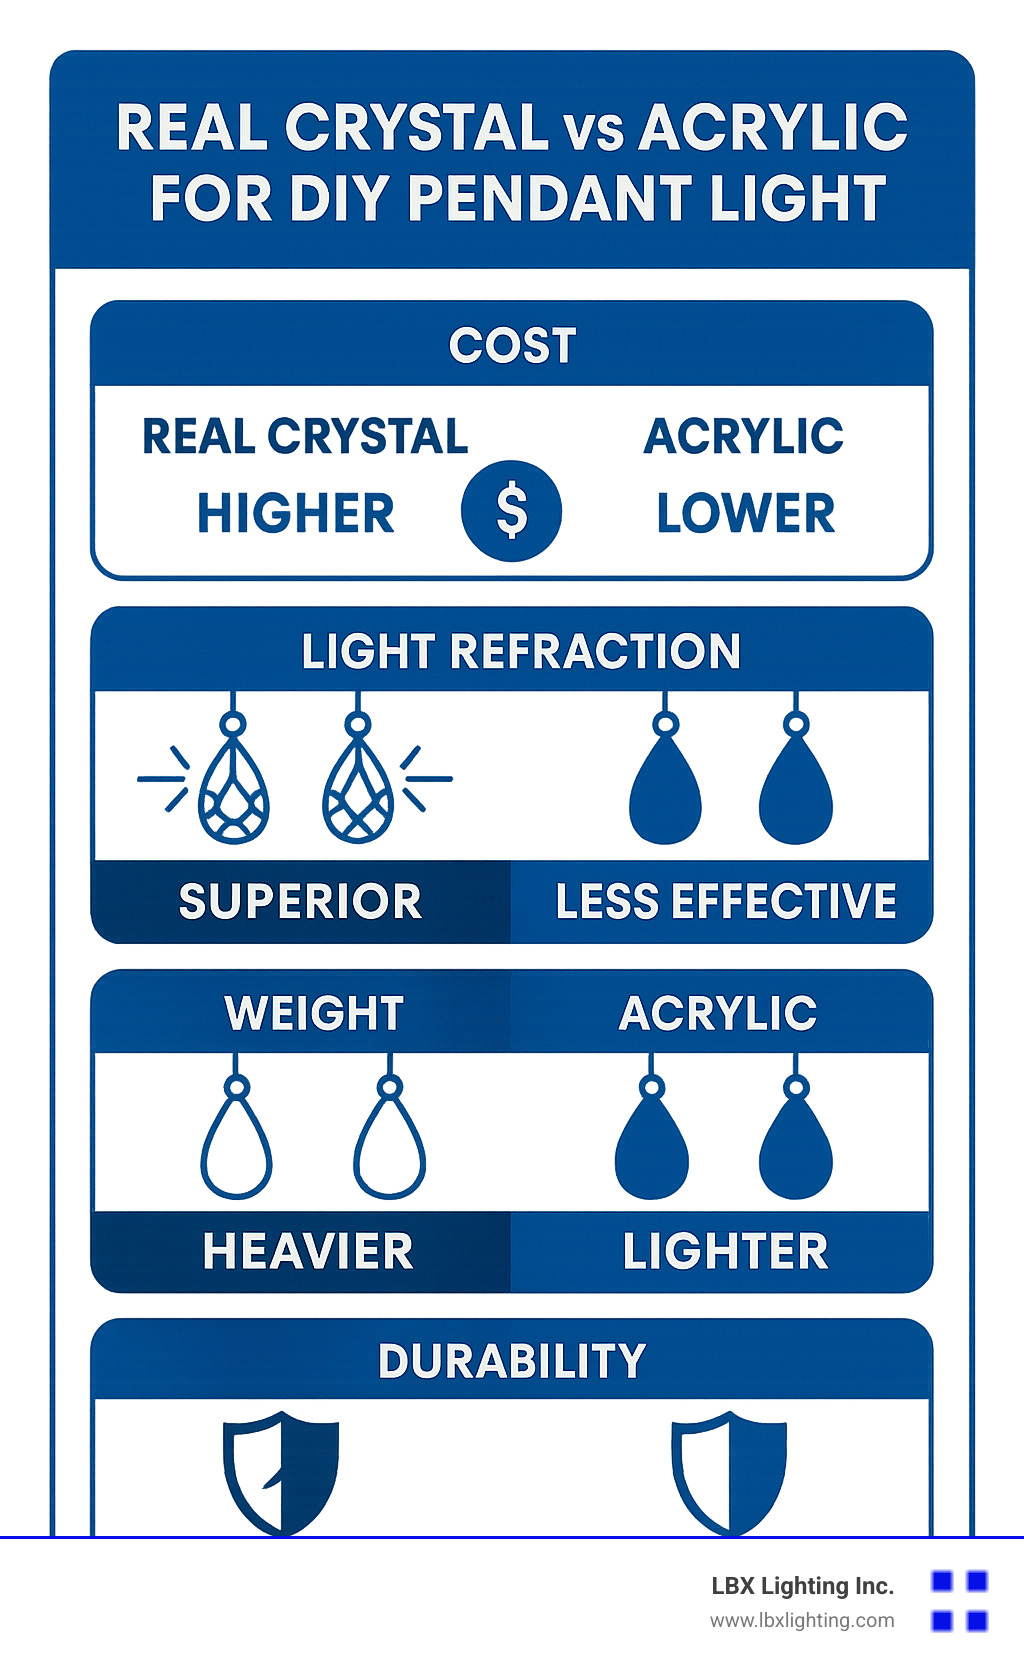
Can I swap real crystals for acrylic to save weight and money?
Absolutely yes! In fact, for most DIY projects, I actively encourage using acrylic alternatives. They’re significantly more budget-friendly (you can find acrylic crystal garland for about $13 for 30 feet), much lighter (which puts less strain on your fixture), and far less likely to break during your creative process.
Modern acrylic crystals have come a long way—many offer excellent light refraction that beautifully mimics real crystal. While genuine lead crystal does provide superior sparkle and will last for generations with proper care, the practical benefits of acrylic often make it the smarter choice for DIY projects.
As one of our satisfied customers noted after completing her diy crystal pendant light: “I used acrylic crystals that cost a fraction of real ones, but when the light hits them just right, nobody can tell the difference!” The most important thing is creating a fixture you love that brings that magical sparkle to your home—whether you choose real crystal or a high-quality acrylic alternative.
At LBX Lighting, we can help you weigh these options based on your specific project needs and budget constraints. Either way, your finished pendant will bring years of beauty to your space when properly maintained.
Conclusion
Creating your own diy crystal pendant light brings so much more to your home than just beautiful illumination. There’s something magical about flipping the switch for the first time and watching your handcrafted creation cast dancing rainbows across your walls. Even better is the pride you’ll feel knowing you’ve created a stunning fixture that would cost hundreds more in a store.
I’ve guided countless customers through this process at LBX Lighting, and the joy on their faces when they share photos of their completed projects never gets old. One customer recently told me, “Every time I walk into my dining room, I smile looking up at my creation. My guests can’t believe I made it myself!”
This is typically a one-day project for most homeowners. With just a few hours of focused work, you can transform ordinary materials into an extraordinary focal point that lifts your entire space. The cost comparison speaks for itself – spending $26-60 on materials versus $150-1500 for store-bought versions means you’re not just creating beauty, but being financially savvy too.
Safety should always remain your top priority when working with electrical components. If you’re uncertain about any aspect of the wiring or installation, please consult with a professional electrician. At LBX Lighting in Houston, our team is always ready to provide guidance on your DIY lighting projects, no matter how simple or complex.
For those looking for inspiration or high-quality crystal components, I invite you to explore our selection of crystal chandeliers or visit our showroom in Houston. Our lighting experts can help you select perfect crystals, recommend the right hardware, or provide personalized advice for your unique design vision.
The elegance of crystal lighting is truly within your reach. With the knowledge you’ve gained from this guide, some basic tools, and a touch of creativity, you can bring sparkle and sophistication to any room in your home. Happy crafting, and may your diy crystal pendant light bring you joy and compliments for years to come!


