

Illuminate with Ease: Crystal Chandelier Installation Guide
April 29, 2025
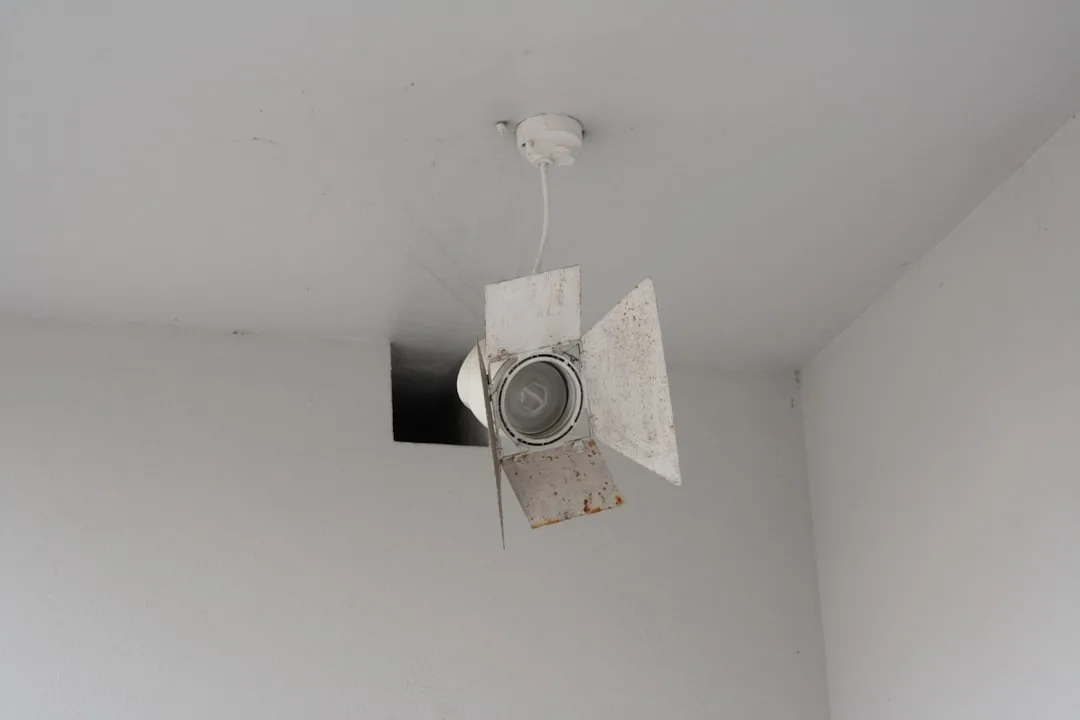
Don’t Sweat It—Houston’s Best Ceiling Fan Repair Experts
May 1, 2025
When Your Ceiling Fan Stops Working: Symptoms and Solutions
Ceiling fan repair is often simpler than you might think. That annoying wobble or mysterious humming doesn’t necessarily mean you’re facing a complicated fix or expensive replacement. Most issues can be resolved with some basic troubleshooting and a few household tools.
| Problem | Quick Fix |
|---|---|
| Fan won’t turn on | Check circuit breaker and wall switch |
| Wobbly fan | Tighten screws and clean blades |
| Noisy operation | Lubricate bearings or tighten hardware |
| Remote not working | Replace batteries or reprogram |
| Light not working | Replace bulbs or check wiring |
We’ve all been there – it’s the hottest day of summer, you flick the switch, and… nothing happens. Or maybe your fan has developed an irritating wobble that makes you wonder if it’s about to take flight. These moments aren’t just frustrating; they impact your comfort and can even affect your energy bills if you’re forced to crank up the AC instead.
The good news? Most ceiling fan problems stem from simple issues like loose connections, dust buildup, or worn components. With some basic knowledge, you can often fix these problems yourself. And even if you do need professional help, the national average cost for repairing a ceiling fan ranges between $70 and $200, with most homeowners paying around $145 – much less than replacing the entire fixture.
I’m Michael Eftekhar, and in my 30+ years in the lighting industry, I’ve seen thousands of ceiling fan issues that seemed major but had surprisingly simple solutions. I’ve guided homeowners through quick fixes that saved them hundreds of dollars and extended their fans’ lifespans by years. What I’ve learned is that with the right guidance, most people can handle ceiling fan repair themselves and feel pretty accomplished afterward!

Before you pick up the phone for professional help, take a moment to consider some common issues. Is your fan humming but not spinning? This could indicate a capacitor problem. Has the pull chain snapped off inside the switch? That’s a straightforward replacement job. Maybe your fan wobbles wildly when running at higher speeds – often fixable with a simple balancing kit.
For more specific issues, we have detailed guides that might help:
– ceiling fan motor makes sound but does not turn
– fan chain broke
– ceiling fan motor replacement
Throughout this guide, we’ll walk through the most common ceiling fan problems and their solutions – no electrical engineering degree required! With some patience and the right approach, you might be surprised at what you can fix yourself.
Spot the Problem Fast: Common Symptoms & What They Mean
Is your ceiling fan acting up? Don’t worry – most problems have simple solutions once you know what to look for. As a homeowner, recognizing these common symptoms can save you time, money, and frustration.
That wobble driving you crazy? It’s usually just unbalanced blades or a few loose screws. That mysterious humming sound? Often it’s your capacitor telling you it’s ready for retirement. Ceiling fan repair becomes much easier when you can quickly identify what’s happening.
“Ceiling fans deteriorate with usage producing issues such as noises, vibration, and heating,” explains Don Vandervort, a home improvement expert with over 30 years of experience. “Catching these problems early can prevent more expensive repairs down the road.”
When your fan refuses to spin but makes noise, your motor might be struggling, or the capacitor could be failing. A stuck pull chain usually means the internal switch mechanism is jammed or broken. And those annoying flickering lights? Often it’s just loose bulbs or wiring connections that need attention.
If your fan speeds seem off, your capacitor or speed control switch might need replacing. Remote control headaches typically come down to dead batteries or pairing issues. And if your fan feels hot to the touch, it’s telling you something’s wrong – possibly inadequate lubrication or electrical problems.
Quick Visual Checks
Before reaching for tools, take a moment for some simple visual inspections. Dust buildup is a sneaky culprit that creates imbalance and reduces efficiency – a quick cleaning might solve your problem instantly.
Grab a stepladder and check for loose screws on the blades, motor housing, and mounting bracket. While you’re up there, examine the blades from different angles to spot any warping or damage. Make sure the canopy (that’s the part covering the ceiling mount) sits snugly against the ceiling.
“A few-month-old living-room fan that hums but won’t start can often be fixed by checking the switch position,” notes one repair technician I work with at LBX Lighting. “It’s amazing how often the solution is hiding in plain sight.”
All your blades should have the same angle or “pitch” – uneven blade angles will cause wobbling and noise. These quick visual checks take just minutes but can reveal simple fixes for frustrating problems.
Electrical Checks Without Taking It Apart
Before you start disassembling anything, try these non-invasive electrical checks that might save you a lot of trouble:
First, double-check your wall switch – sometimes it’s not fully flipped to ON. If your fan uses a remote, try replacing the batteries. Your circuit breaker might have tripped, so check your electrical panel. Make sure any light bulbs are properly seated, and check that the reverse switch isn’t stuck between settings.
A homeowner recently told me, “Sometimes the reverse/speed selector switch left in the middle position will prevent rotation. I spent hours troubleshooting only to find this simple fix!”
A voltage tester can be your best friend here – it confirms whether power is reaching the fan without removing any components. If you have a multimeter, you can also check the neutral wire connection, which is sometimes overlooked.
Ceiling fan repair often comes down to methodical troubleshooting. By checking these common symptoms first, you’ll solve most problems without ever needing to call a professional. And if you do need expert help, you’ll be able to describe the issue precisely, saving time and money on the repair.
Troubleshooting a Fan That Won’t Turn On
When your ceiling fan refuses to spin, don’t panic! This is actually the most common issue homeowners face, and often has a simple solution. Let’s walk through how to get your fan whirring again.
First, check your circuit breaker. It’s amazing how often this is the culprit! Head to your electrical panel and look for any switches that are flipped to OFF or stuck in that awkward middle position. If you find one, reset it by pushing it fully to OFF, then back to ON. You’d be surprised how many “complicated repairs” end right here!
If your breaker looks fine, the wall switch might be the problem. Sometimes these wear out without any visible signs. You can test it by gently wiggling it or, if you’re comfortable with basic electrical work, bypass it temporarily. As one homeowner told me, “I spent three hours troubleshooting my fan only to find my wall switch was bad despite looking perfectly normal!”
Don’t overlook the reverse switch on the fan itself. “A humming sound usually indicates a motor issue; no sound often points to a wiring problem,” according to Mr. Electric. That little directional switch can sometimes get stuck between forward and reverse positions. Make sure it’s pushed fully to one side or the other.
For those willing to take a closer look, inspect the wiring harness. You’ll need to remove the fan canopy (the decorative cover at the ceiling), but this often reveals the issue. “Reseating any loose wires in the harness connector often restores power to the motor,” notes an experienced technician I spoke with recently.
Many ceiling fan repair issues actually stem from a failed capacitor. This small, cylindrical component gives your fan motor the boost it needs to start spinning. “Electrolytic capacitors on those old ceiling fans do go bad. That’ll cause the motor to run slow, just hum, or not run at all,” explains Wayfaring Stranger, an experienced DIYer who’s fixed dozens of fans.

Step-by-Step Power Flow Test
If you’re still stumped, try tracing the power systematically:
- Turn off power at the breaker: Safety first! I can’t stress this enough.
- Use a non-contact voltage tester: Before touching anything, verify power is truly off.
- Check power at the switch: Turn power back on and test if electricity reaches the switch.
- Test power at the ceiling box: If the switch has power, check if it’s reaching the ceiling junction box.
- Verify connections at the fan: If power reaches the ceiling but not the fan, check the wiring connections.
As one repair expert colorfully puts it, “When a fan is dead, you flip the switch and get: Zero. Zilch. That’s when you need to trace the power systematically to find where it’s getting interrupted.”
Ceiling Fan Repair Checklist
When your fan won’t spin, work through these steps methodically:
Reset the circuit breaker, test or replace the wall switch, check remote batteries and pairing (if applicable), verify the reverse switch position, inspect all wiring connections, test the capacitor, and finally, evaluate if the motor itself has failed.
“If the repair appears beyond your abilities, call a fan repair pro or electrician,” advises Don Vandervort. There’s no shame in knowing your limits! While many ceiling fan repair issues are DIY-friendly, electrical work can be tricky and sometimes dangerous if you’re not comfortable with it.
If you’re in the Houston area and need professional help, check out more information about electrician help for your ceiling fan troubles.
Stop the Wobble, Squeak & Hum: Noise-Free Operation
A wobbly or noisy ceiling fan isn’t just annoying—it can signal problems that might grow into bigger headaches if ignored. As one ceiling fan specialist told me recently, “Even a tiny vibration in the fan motor can become amplified through the blades, creating that maddening noise we all hate.”
Let’s tackle these common noise and stability issues together with some straightforward solutions.
Rebalancing in 10 Minutes
That irritating wobble in your ceiling fan? You can fix it in less time than it takes to watch your favorite sitcom. Start by thoroughly cleaning all blades – it’s amazing how just one dust-covered blade can throw everything off balance. I’ve seen fans transform from wobbling disasters to smooth operators after nothing more than a good dusting!
Next, tighten every single screw you can find – blade screws, motor housing screws, and especially that mounting bracket. Over time, the natural vibration of your fan gradually loosens these connections.
For a quick check of blade alignment, grab a yardstick and measure from the ceiling to each blade tip. They should all be equal. If not, you may need to gently bend a blade bracket back into position.

If you’re still experiencing wobble, it’s time to use a balancing kit. These inexpensive kits include clips and weights that can work wonders. The process is surprisingly simple: attach the test clip to the middle of one blade’s trailing edge, turn the fan on medium speed, and observe. Then move the clip to each blade until you find the position that minimizes wobble. Once identified, attach a permanent weight at that spot.
No balancing kit on hand? In a pinch, you can temporarily use small adhesive weights or even coins taped to the top of blades to test where weight is needed. I once fixed a client’s wobbling fan with nothing but a nickel and some tape!
Want to explore different blade options that might improve balance? Check out more information about Fan Blade options.
Silencing Bearings & Motors
Those squeaks and hums often stem from dry bearings or loose components. A few drops of light machine oil applied to accessible bearing points can work miracles for squeaky fans. Just be careful not to over-lubricate, which can attract more dust.
Tightening the housing screws is another quick fix many homeowners overlook. The constant vibration of your fan can gradually loosen these screws, creating more noise over time.
Make sure no wires are touching the motor housing, as this contact can create buzzing sounds. Installing rubber washers or isolation pads between mounting brackets and the ceiling box can significantly reduce vibration transfer and the noise that comes with it.
For persistent humming, check if your fan is on a standard dimmer switch. These can cause electrical humming in ceiling fan motors. As one repair expert advised me, “Install an anti-hum fan control with the correct amperage rating” for best results.
“Some noise is normal,” a service technician from Mr. Electric once told me, “but excessively loud hums or thumps usually indicate a problem you can fix by replacing an old fan, tightening mounting screws, or calling a professional if needed.”
Fan-rated boxes are crucial for proper installation and noise reduction. If your fan is mounted to a regular electrical box, this could be the source of your noise problems, and upgrading to a fan-rated box might be necessary for truly silent operation.
Ceiling fan repair doesn’t have to be complicated or expensive. With these simple techniques, you can enjoy the quiet comfort of your fan once again—no more disruptive wobbles or annoying noises to interrupt your peaceful home environment.
Ceiling Fan Repair or Replace? Costs, Lifespan & Warranties
Let’s face it—standing in your living room, staring up at a broken ceiling fan, you’re probably wondering: “Should I fix this thing or just buy a new one?” It’s a common dilemma, and the answer isn’t always straightforward.
Most ceiling fans faithfully serve your home for about 15 years before showing their age. Quality models from reputable manufacturers can even stretch beyond 20 years if you’ve been giving them a little TLC along the way.
“When my Hunter fan started making strange noises after 18 years, I was surprised to learn it was actually worth fixing,” shares Maria, a homeowner from Dallas. “The repair cost less than half of what a comparable new fan would have set me back.”
When it comes to ceiling fan repair costs, here’s what you can generally expect to pay:
- Simple fixes like pull chain replacements typically run $50-$100
- Switch replacements hover in the $70-$150 range
- Light kit issues usually cost $70-$175 to resolve
- Capacitor replacements (those little electronic components that help your fan start) average $70-$125
- Motor replacements—the most serious repair—range from $100-$350
One thing to keep in mind: labor makes up about 60% of repair costs, with parts accounting for the remaining 40%. This explains why professional repairs often seem pricey compared to the cost of components alone.

Signs It’s Worth Repairing
Your fan is probably worth saving if it’s relatively young—generally under 8 years old. The math just works out better when you’ve got plenty of life left in the unit.
Minor issues like a broken pull chain or finicky remote often make for straightforward, cost-effective repairs. I recently helped a customer repair a high-end Casablanca fan with a simple switch replacement that cost just $85—a bargain compared to the $400 replacement cost.
Décor matching matters more than people realize. That oil-rubbed bronze fan that perfectly complements your living room furniture? It might be worth repairing just to maintain your room’s carefully curated aesthetic.
High-quality fans like Hunter, Casablanca, or Minka Aire typically justify repair costs because their motors and components are built to last. As one repair technician told me, “I’ve seen 30-year-old Hunter fans that just needed a new capacitor to run like new again.”
Parts availability is another consideration. Many manufacturers maintain excellent parts support for years after models are discontinued. When parts are readily available, repairs become much more practical.
Signs It’s Time to Replace
Sometimes, saying goodbye is the smarter choice. When your fan’s motor is burned out, replacement often makes more financial sense than repair. As one industry expert puts it, “A failing motor is like a car with a bad transmission—sometimes you’re throwing good money after bad.”
Outdated fans from the 1980s or 1990s lack the energy efficiency of modern models. Today’s ENERGY STAR rated fans can use up to 60% less energy than older models, potentially saving you money in the long run. According to the scientific research on ceiling fan efficiency, newer DC motor fans can be dramatically more efficient.
Follow the 50% rule: if repair quotes exceed half the cost of a comparable new fan, replacement is usually more economical. I’ve advised countless customers using this simple guideline.
Parts scarcity can be the final nail in the coffin for older fans. When manufacturers discontinue models, parts eventually become impossible to find. One customer spent weeks hunting for parts for a 1990s fan before finally giving up and purchasing a new one.
New features might tempt you toward replacement. Modern fans offer remote controls, smart home integration, reversible motors, and LED lighting with dimming capabilities. As one homeowner told me after upgrading, “I had no idea what I was missing with my old fan. Being able to control it from my phone is a game-changer.”
At LBX Lighting, we’ve helped thousands of Houston homeowners steer this decision. Whether you choose repair or replacement, what matters most is finding the solution that keeps you comfortable while respecting your budget. If you decide a new fan is the way to go, we’d be happy to help you explore our ceiling fan selection.
DIY Safety, Tools & Step-by-Step Ceiling Fan Repair
Taking on ceiling fan repair as a DIY project can save you money while giving you the satisfaction of fixing something yourself. But before you climb that ladder, let’s talk safety and preparation—because a successful repair starts with the right approach.

Ceiling Fan Repair Safety Tips
Electricity deserves your respect, friends. I’ve seen too many DIYers skip safety steps only to get a shocking reminder of why they matter.
“Always turn off power at the circuit breaker before servicing,” as Hunter Fan Company wisely emphasizes. Your wall switch isn’t enough protection—circuit breakers are your true friends here. After turning off the power, always double-check with a non-contact voltage tester before touching any wires. That little tool has saved countless DIYers from nasty shocks.
When setting up your ladder, position it properly with a 4-to-1 ratio (for every 4 feet of height, place the base 1 foot from the wall). If possible, have someone hold the ladder steady—ceiling fan repairs and wobbly ladders don’t mix well! And don’t forget those safety glasses—they protect your eyes from the surprising amount of dust and debris that can fall during repairs.
If your repair involves capacitors, treat them with extra caution. These components can store electricity even after the power is off. Use insulated tools to safely discharge them by connecting the terminals with a resistor or insulated screwdriver.
Essential Tools & Materials
Your ceiling fan repair toolkit doesn’t need to be fancy, but it does need to be complete. Most fan fixes require basic tools you might already have around the house.
A non-contact voltage tester should be your constant companion for any electrical work. Both Phillips and flathead screwdrivers are must-haves, as ceiling fans typically use both types. Wire strippers, wire nuts, and electrical tape will handle any wiring needs, while a good pair of pliers helps with stubborn parts.
For diagnostics, a basic multimeter is worth its weight in gold. It helps you test capacitors, check for continuity, and verify voltage. A sturdy step ladder that reaches your ceiling comfortably is essential—stretching and reaching is how accidents happen.
“Take photos of wiring connections before disassembly to aid in proper reassembly,” suggests a repair expert I know. This simple smartphone trick has saved me hours of head-scratching during reassembly. Your future self will thank you!
Don’t forget the small but mighty helpers: light machine oil for lubricating bearings and a blade balancing kit for those wobble issues. And of course, any replacement parts specific to your repair—bringing home the wrong pull chain switch can turn a 20-minute job into a multi-day project.
Swap Out Common Parts in Under an Hour
With the right preparation, replacing common ceiling fan parts is surprisingly straightforward. Let me walk you through the most frequent repairs:
Replacing a broken pull chain is one of the most common fixes. After turning off power at the breaker (not just the switch!), remove the switch housing cover to access the pull chain switch. Before disconnecting anything, take a quick photo of the wire connections. Then disconnect the wires from the old switch, connect them to the new one in exactly the same configuration, secure everything back in place, and restore power to test.
Capacitor replacement follows a similar pattern. These cylindrical components are often the culprits behind fans that hum but won’t start. After cutting power and removing the switch housing, locate the capacitor and document its wire connections. Carefully disconnect the wires, install the new capacitor (using one with identical ratings is crucial), reconnect everything exactly as before, and reassemble. As one electrical expert warns, “Match capacitor replacement ratings exactly for safe and efficient operation.” Using the wrong capacitor isn’t just ineffective—it can damage your fan or create safety hazards.
For blade replacement, the process is more straightforward but requires attention to detail. After turning off the power, remove the blade by unscrewing the mounting screws, clean the motor housing attachment point (you’d be surprised how much dust accumulates there), and attach the new blade with the original screws. The key here is ensuring all blades maintain the same angle and checking for balance after installation.
“Match new blades to original size and orientation to maintain performance,” suggests our fan specialists at LBX Lighting. Mismatched blades are a recipe for wobbling and inefficient operation. If you’re replacing just one blade, try to find an exact match to the others—or consider replacing all blades as a set for optimal performance.
For more specific guidance on pull chain issues, check out our detailed guide on fan chain broke solutions.
If your repair feels beyond your comfort zone after reading these steps, there’s no shame in calling a professional. Some problems, particularly those involving complex wiring or motor issues, are best left to experts with specialized tools and training. The Hunter troubleshooting guide is another excellent resource for brand-specific solutions.
Frequently Asked Questions about Quick Ceiling Fan Fixes
Why does my ceiling fan hum but not spin?
If your fan is making noise but refusing to move, don’t worry—this happens more often than you might think.
A humming fan that won’t spin usually points to one of several fixable issues. The most common culprit is a failed capacitor, which is like your fan’s “starter motor.” As one technician I spoke with explained, “You’ll often notice one or two speed settings stop working before the fan fails completely.” This little cylindrical component provides the initial boost your fan needs to start turning.
Another possibility is seized bearings. These small but crucial parts can get gummed up over time, especially in humid environments or after long periods without use. I remember one homeowner who told me, “I sprayed a tiny bit of WD-40 on the bearings, and my old fan started spinning again like magic!” While this can work as a temporary fix, proper bearing lubricant is better for long-term solutions.
Sometimes the fix is even simpler—check your directional switch. It might sound silly, but a reverse switch caught between forward and reverse positions will leave your fan humming helplessly. Make sure it’s clicked firmly into position.
Loose wiring connections can also cause this symptom. Over time, the vibration from normal fan operation can gradually loosen the wiring harness connections, preventing power from reaching the motor properly.
How do I rebalance a ceiling fan without a kit?
When your fan starts doing its best washing machine impression, you don’t necessarily need a fancy balancing kit to fix it. There are several DIY approaches that work quite well.
Start with the basics: give those blades a thorough cleaning. You’d be surprised how much dust can accumulate on the top side of fan blades where you can’t see it. This uneven weight distribution is often all it takes to cause wobbling.
Next, grab your screwdriver and check every single screw—on the blades, housing, and mounting bracket. Loose hardware is a common culprit behind fan wobble. Just be careful not to overtighten, which can warp the blades.
If cleaning and tightening don’t solve the problem, try the yardstick method. Hold a yardstick vertically from the ceiling to the tip of each blade as you manually rotate the fan. All measurements should be identical. If they’re not, gently bend the blade brackets until all blades are level.
For a makeshift balancing solution, try this trick: tape a small coin or paperclip to the top center of one blade. Test different blades and positions until you find the spot that minimizes wobble. Once identified, you can replace the temporary weight with something more permanent and less visible, like neutral-colored electrical tape.
“I’ve seen people transform violently wobbling fans into smooth operators with nothing more than a quarter and some tape,” one of our technicians at LBX Lighting told me recently. “Though I still recommend a proper balancing kit for long-term fixes.”
When should I call a professional instead of DIY?
While I’m all for empowering homeowners to tackle their own ceiling fan repair projects, there are definitely times when calling in the pros makes more sense.
If your repair involves new wiring or electrical work beyond simple component swaps, it’s best to call a licensed electrician. Electrical code violations aren’t just about getting a fine—they’re about your family’s safety. As one electrician explained to me, “Ceiling fans have specific wiring requirements that many homeowners don’t realize. Getting it wrong can create fire hazards.”
Structural concerns are another red flag. Your ceiling fan needs to be properly supported—typically with a fan-rated electrical box securely attached to a ceiling joist. If your fan seems unstable or you’re unsure about the mounting, professional installation is worth every penny.
Pay attention to patterns, too. If you’ve replaced the same part multiple times and the problem keeps returning, there’s likely a deeper issue that a professional can diagnose. One customer told me she replaced her fan’s pull chain three times before an electrician finded the real problem was in the wall switch.
Complex wiring situations—like fans with remote controls, multiple light kits, or integration with smart home systems—often benefit from professional expertise. As a technician once put it, “When you’re dealing with five different colored wires that all need to go to very specific places, the margin for error gets pretty slim.”
Finally, consider your home insurance requirements. Some policies specify that electrical fixtures must be installed or repaired by licensed professionals to maintain coverage. That peace of mind alone can be worth the service call.
At the end of the day, there’s no shame in calling for help with your ceiling fan repair. Sometimes the smartest DIY decision is knowing when to bring in the experts.
Conclusion
Ceiling fan repair doesn’t have to be complicated or expensive. With the right approach, many common issues can be resolved quickly, restoring comfort to your home and extending the life of your fan. When your ceiling fan works properly, you’re not just enjoying better airflow—you’re also saving on energy costs and maintaining the perfect comfort level in your home.

A little regular maintenance goes a long way. Taking time to clean those blades, tighten loose screws, and add a drop of lubricant to moving parts can prevent many problems before they have a chance to develop. Think of it as giving your fan a quick health check every few months—it’s much easier than dealing with a complete breakdown on the hottest day of summer!
Here at LBX Lighting Inc. in Houston, we’ve seen how important a working ceiling fan is during our sweltering Texas summers. Our team understands that sometimes you want to tackle repairs yourself, while other times you might need expert guidance or quality replacement parts. Either way, we’re here to help with solutions custom to your specific situation and budget.
Remember these key takeaways from our guide:
– Most ceiling fan problems come from simple issues like dust buildup, loose connections, or worn components that you can often fix yourself
– With proper care, your fan can last well beyond the average 15-year lifespan
– When electrical work makes you uncomfortable, it’s always smart to call a professional
– Investing in proper repairs typically pays for itself through extended fan life and lower energy bills

The troubleshooting steps we’ve shared can help you diagnose and fix many common ceiling fan issues on your own. Not only will you save money, but there’s also that wonderful feeling of accomplishment when you solve a problem yourself. Of course, for more complex issues or if you’re thinking about upgrading to a more energy-efficient model, we invite you to explore our ceiling fan selection for quality options backed by our knowledgeable support team.
Did you know that a properly functioning ceiling fan can help reduce your cooling bills by allowing you to set your thermostat up to 5-7 degrees higher while maintaining the same comfort level? That’s an energy-saving benefit that makes the small investment in maintenance and repair more than worthwhile. Your wallet—and the planet—will thank you!


