

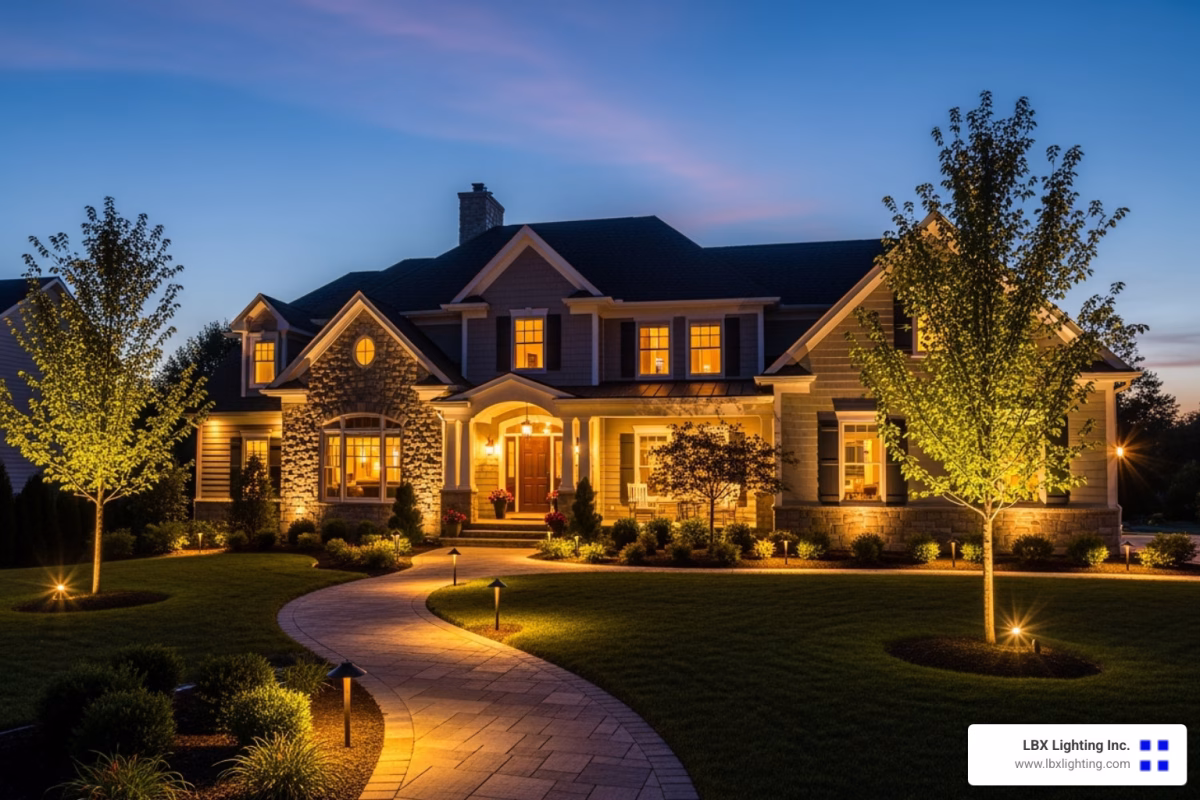
Old Lights, New Life: How to Restore Your Vintage Lamps
September 26, 2025
Drop-In Brilliance: Your Guide to Recessed Lighting in Drop Ceilings
September 28, 2025
From Blinking Bulbs to Dazzling Displays
How to build a christmas light control system involves three main components: a computer or playback device, a pixel controller, and addressable LED lights. The controller translates digital commands into signals that tell each individual light what color to display and when, creating synchronized patterns that can dance to music or follow programmed sequences.
Essential Components for Building a Christmas Light Control System:
- Addressable LED Lights – WS2811 or WS2812B pixels that can be controlled individually
- Pixel Controller – Hardware that converts network data to light signals (ESP8266 with WLED, Falcon F16V3, or similar)
- Power Supply – 12V DC supply sized for your light count
- Sequencing Software – xLights (free) for creating animations and effects
- Network Connection – Ethernet or WiFi to connect controller to computer
- Weatherproof Enclosure – Protection for outdoor electronics
The system works by sending E1.31 protocol data over your network from sequencing software to the controller, which then drives the individual pixels. A basic setup can be built for under $200 and control hundreds of lights, while more elaborate displays may cost several thousand dollars depending on scale.
Whether you’re inspired by those spectacular neighborhood displays that make Christmas lights “dance to music” or simply want to move beyond static holiday decorations, building your own system is surprisingly achievable. The same principles used in professional theme park displays can be scaled down for residential use with readily available components.
I’m Michael Eftekhar, and with over 30 years of experience in lighting solutions, I’ve helped countless clients understand how to build a christmas light control system that transforms their holiday vision into reality. At LBX Lighting Inc., we’ve seen the evolution from simple timer-controlled displays to sophisticated pixel-based systems that rival commercial installations.

Understanding the Core Components and Concepts
This section breaks down the essential hardware and terminology you’ll need to know before you start your build, from the lights themselves to the brains that control them.
Choosing Your Lights: Traditional vs. Addressable LEDs
Picture the Christmas displays from your childhood – those warm, twinkling lights that simply turned on and off. These AC incandescent lights were controlled through relay control systems, essentially sophisticated switches that could turn entire sections of lights on or off together. While charming, they offered limited creative possibilities.
The real magic happens when you find addressable LEDs. These lights changed everything about how to build a christmas light control system. Instead of controlling entire strings, you can command each individual light to display any of over 16 million colors. This individual control is what creates those mesmerizing waves of color and intricate patterns you see in modern displays.
When choosing addressable LEDs, you’ll encounter two main chip types: WS2811 and WS2812B. Both offer reliable performance, with the WS2812B being slightly more integrated and popular for newer projects.
Your lights will come in two primary forms. Pixels are individual LED bulbs, often shaped like traditional C9 bulbs or housed in 12mm weatherproof nodes. They’re incredibly durable and perfect for props like trees or decorative elements that you’ll set up and take down each year.
Strips offer a different approach – continuous flexible ribbons packed with tiny LEDs. They provide higher density and lower cost per light, making them ideal for outlining rooflines or creating smooth color washes.
| Feature | Pixels | Strips |
|---|---|---|
| Durability | High (individual encased bulbs) | Moderate (flexible PCB can be fragile) |
| Pixel Density | Lower (spaced out bulbs) | Higher (many LEDs per foot) |
| Cost | Higher per pixel | Lower per pixel |
| Installation | Push into mounting holes/clips | Adhere with adhesive backing/channels |
Powering Your Show: 5V vs. 12V Systems
Power might seem straightforward, but choosing between 5V systems and 12V systems significantly impacts your display’s performance and complexity.
5V systems excel with shorter runs of lights – typically up to 50 pixels. They deliver excellent brightness and color accuracy, but they’re vulnerable to voltage drop. As electricity travels down your wire, it loses strength, causing distant lights to appear dimmer or display wrong colors. The solution is power injection – adding fresh power connections every 50 lights or so.
12V systems handle longer runs much better, maintaining brightness consistency across greater distances. You might only need power injection every 100 lights, simplifying your wiring considerably. While they consume slightly more total power, their reliability over distance makes them popular for larger displays.
Regardless of voltage, proper power consumption calculations are crucial. Size your power supply with some headroom – your lights will thank you with stable, consistent performance. For deeper insights into managing power effectively, explore our guide on LED Lighting Control Systems.
The Brains of the Operation: Pixel Controllers
The pixel controller is where the magic truly happens. Its controller function is beautifully simple yet sophisticated: translating data from your computer into commands that each individual light understands.
Most DIY systems use the E1.31 protocol, which packages lighting data into network packets. Think of it like sending emails to your lights – each packet contains instructions for 512 channels (called a universe). Since each pixel needs three channels for red, green, and blue, one universe controls about 170 pixels.
DMX protocol offers another option, more common in professional theater but perfectly capable for Christmas displays. Both protocols achieve the same goal through slightly different technical approaches.
For DIY controllers, the ESP8266 microcontroller running WLED firmware offers incredible value. These WiFi-enabled boards can control hundreds of pixels for under $20. They’re perfect for learning and smaller displays.
Dedicated controllers step up the game significantly. Purpose-built units handle larger displays with rock-solid reliability. These controllers connect to your home network, letting you place light elements anywhere around your property while maintaining central control.

The beauty of modern controllers lies in their networking capabilities. Whether connected via Ethernet or WiFi, they receive your creative vision from sequencing software and transform it into the coordinated light show that will make your home the neighborhood’s holiday destination.
How to Build a Christmas Light Control System: A Step-by-Step Guide
Here is the core of your project. We’ll walk through the practical steps of planning your layout, assembling the hardware, and getting the software configured for your first test.
Step 1: Planning Your Holiday Masterpiece
The magic begins long before you plug in your first light. Think of your home as a blank canvas waiting for your creative vision. I always recommend starting with a simple house photo – print it out or pull it up on your tablet so you can sketch directly on it.
Walk around your property and imagine the possibilities. Will you outline the roofline with a steady glow of warm white? Perhaps frame each window and door with colorful pixels? Maybe you’re dreaming bigger with a spectacular MegaTree as your yard’s centerpiece.
Speaking of MegaTrees, they’re not as intimidating as they look. A 13-foot MegaTree with 16 strands of 50 pixels each (that’s 800 total pixels) can actually be built in just over 4 hours. It’s one of those projects that looks incredibly complex but breaks down into manageable steps.
As you plan each element, you’ll need to calculate your pixel count for every prop. This isn’t just for budgeting – it’s crucial for determining your power requirements. A roofline might need 200 pixels, window frames another 150, and that MegaTree adds 800 more. These numbers add up quickly, and knowing them upfront prevents surprises later.
For detailed guidance on creating your vision, check out our comprehensive guide on How to Develop a Lighting Plan. It walks you through the professional approach we use for our commercial installations.
Sourcing components requires some strategy. While you can buy individual pixels directly from overseas suppliers, I’ve found that specialized DIY vendors offer better quality and support. Companies like DIYLEDExpress and Boscoyo Studio not only sell pixels but also offer custom “coro” plastic shapes – think stars, arches, and candy canes – plus complete MegaTree kits that eliminate guesswork.
The secret is to order early. Many vendors run presales in late winter and early spring with significant discounts. This gives you plenty of time to plan and ensures everything arrives before the holiday rush.
Step 2: Assembling the Hardware
Now comes the hands-on fun. Controller setup starts with creating a weatherproof home for your electronics. You have options here – a small metal or plastic weatherproof enclosure works perfectly, or you can get creative with a piece of 1-inch thin-wall PVC pipe. The PVC approach is surprisingly neat for smaller controllers like the ESP8266, creating a compact, completely weatherproof unit.
Power supply wiring demands your careful attention since you’re converting dangerous 120V AC to safe low-voltage DC. Take your time here – secure every connection with electrical tape and heat shrink tubing. Ferrules (those little metal crimp connectors) make terminal block connections look professional and stay secure. For outdoor wiring, invest in proper outdoor-rated cable like H07-RNF.
Don’t forget about fusing your circuits. A simple inline fuse can save your entire display if something goes wrong.

Connecting pixels involves waterproof connectors – usually 3-pin or 2-pin round connectors that create reliable outdoor connections. You’ll likely need to make custom pigtails (short extension cables) to reach from your controller to your first pixel strand.
Here’s a professional tip: ethernet cables make excellent pixel extension cables. By twisting specific wire pairs together, you can carry power, ground, and data over distances up to 50-60 feet while minimizing electrical interference.
Power injection keeps your lights bright and colorful from beginning to end. For 5V systems, inject fresh power every 50 pixels. For 12V systems, you can stretch this to every 100 pixels. This means running separate power and ground wires from your power supply directly to points along your light strand.
For very long runs, consider adding null pixels – single pixels that act as signal repeaters to combat data line noise.
Step 3: Configuring the Controller and Software
With your hardware assembled, it’s time to bring everything online. Software installation begins with the Arduino IDE if you’re using ESP-based controllers. Some firmware requires specific versions – Arduino IDE 1.6.5-r2 is commonly referenced in the community.
The heart of your light show creation is xLights, a free and incredibly powerful program that lets you design, create, and play professional-quality lighting displays. Don’t let the “free” part fool you – this software rivals systems costing thousands of dollars.
Network setup is critical for reliable operation. Connect your controller to your home network via Ethernet or WiFi, then assign it a static IP address through your router’s DHCP reservation settings. This prevents the frustrating “controller not found” errors that happen when IP addresses change unexpectedly.
Test your connection by pinging your controller’s IP address from your computer. If it responds, you’re ready to configure.
In xLights, the Controller Configuration happens in the Controllers tab. Add your controller by specifying its IP address and protocol type – E1.31 Unicast is the most common choice. You’ll define which universes and channels each controller manages. Each pixel typically uses 3 channels (red, green, blue), so a 50-pixel strand needs 150 channels.
The Layout Tab is where your planning pays off. Import that house photo you took and draw your props directly onto it. xLights lets you define each prop’s type, size, and pixel count with surprising precision.
Modeling props and mapping pixels completes your setup. For each element, tell xLights how your pixels are arranged – straight lines, zig-zag patterns, or spirals. This crucial step ensures that when you apply a rainbow effect, it flows correctly across your actual lights rather than creating a random mess.
Once you’ve mapped everything correctly, you’re ready to create your first sequence and watch your vision come to life.
Bringing Your Show to Life: Sequencing and Music Synchronization
With the hardware built, it’s time for the creative part. This section covers how to design your light show, create animations, and synchronize every flash and fade perfectly to your favorite holiday music.
The Art of Sequencing in xLights
Here’s where the magic truly happens! Think of sequencing like choreographing a dance, except your dancers are thousands of tiny LED lights. In xLights, we work with a timeline that feels remarkably similar to video editing software – if you’ve ever made a home movie, you’ll feel right at home.
The beauty of xLights lies in its incredible library of effects. We can start simple with gentle fades and smooth color wipes, then graduate to more dynamic chases that race around our roofline, shimmers that make our megatree sparkle like a diamond, and complex textures that create mesmerizing patterns across our entire display.
One of my favorite features is the layers system. Just like in Photoshop, we can stack multiple effects on top of each other. Maybe we want a gentle blue fade across our house while simultaneously having twinkling white stars dancing over the top. Lower layers blend beautifully with higher layers, creating depth and complexity that would be impossible with traditional lighting.
But here’s the real game-changer: importing sequences from the incredibly generous DIY Christmas lighting community. Talented sequencers spend hundreds of hours creating elaborate shows and then share them freely online. We can download these masterpieces, map them to our own props, and customize them to fit our display. This can save us literally weeks of work, since sequencing a full four-minute song from scratch can take 40-60 hours!
Grouping props makes our workflow much smoother. We can select all our window frames at once, apply a synchronized effect, then fine-tune individual windows if needed. When xLights renders our completed sequence at 20 frames per second, it transforms our creative vision into the precise data packets that our controllers understand.

How to build a christmas light control system that syncs with music
The moment when lights dance perfectly in sync with music is pure magic – and surprisingly achievable! How to build a christmas light control system that responds to music can be accomplished for under $50, and it works with any song we choose by analyzing different music frequencies to trigger specific light strands.
We start by loading our audio track directly into xLights. The software displays the waveform right alongside our timeline, making it easy to see where the big crescendos and quiet moments occur. Adding timing marks becomes our secret weapon – these are visual guides we place at beats, musical phrases, or those perfect cymbal crashes where we want a spectacular burst of light.
While xLights doesn’t automatically detect every beat for us, that’s actually a blessing in disguise. Beat detection software often misses the subtle musical nuances that make a show truly spectacular. Our human ears are still the best judges of when that perfect light effect should hit. Trust me, manually timing those effects creates much more impactful shows than any automated system.
For playback options, we have flexibility. During testing and for smaller displays, PC playback works beautifully – xLights sends the E1.31 data directly from our computer to the controllers over our home network. But for the full professional experience, a standalone player like a Raspberry Pi running FPP (Falcon Pi Player) becomes our best friend. We upload our finished sequences to this tiny computer, set up a schedule, and our show runs completely hands-free every night. For massive displays, multiple Raspberry Pis can work together in a master/slave setup for perfect synchronization.
Broadcasting audio completes the experience. A simple low-power FM transmitter lets visitors tune their car radios to our designated frequency and listen to the music while watching our lights dance. There’s something wonderfully nostalgic about families pulling up in their cars, tuning to our station, and enjoying the show together in the warmth of their vehicle. Some of our clients have shared stories of neighbors driving their trucks to the front yard specifically to listen on the radio while staying cozy during the show!
The result? A display that doesn’t just look impressive – it creates genuine emotional moments that families remember for years to come.
Safety, Troubleshooting, and Expansion
A successful project is a safe one. We’ll cover critical safety measures for working with electricity outdoors, common troubleshooting steps, and how to plan for an even bigger and better show next year.
Essential Safety Precautions
Working with electricity outdoors during the holidays can be incredibly rewarding, but it demands our absolute respect for safety protocols. I’ve seen too many enthusiastic builders rush through the safety steps, only to face dangerous situations later.
Mains voltage dangers are the most serious concern we face. Our power supplies connect directly to 120V AC mains power, which can be lethal. Always unplug power supplies before making any connections or adjustments – this isn’t negotiable. Every high-voltage wire must be properly insulated and secured using heat shrink tubing and electrical tape to cover all exposed connections.
Proper grounding and GFCI outlets provide our first line of defense against electrical hazards. Every outdoor outlet powering our display must be protected by Ground Fault Circuit Interrupter (GFCI) devices. These clever devices detect tiny imbalances in current flow and shut off power in milliseconds, potentially saving our lives. Always use grounded plugs – those two-prong adapters have no place in an outdoor lighting setup.
Weatherproofing becomes critical when we’re dealing with outdoor electronics through winter weather. Every controller, power supply, and connection point needs to live inside a weatherproof enclosure. We seal these enclosures completely against water intrusion, using cable glands wherever wires enter or exit.
Creating drip loops might seem like a small detail, but they prevent countless problems. We deliberately dip every outdoor cable below its connection point before it rises to enter an enclosure or device. This simple technique ensures water runs off the cable instead of following it directly into our electrical connections.
Power load management and proper wire sizing prevent the overheating that can lead to fires. We calculate our display’s total amperage draw and verify that our power supplies, extension cords, and household circuits can handle the load safely. Oversizing wires and fuses provides an extra safety margin that’s always worth the small additional cost.
Fusing our power distribution protects both our components and our homes. Appropriate fuses prevent overcurrent situations that could damage equipment or create fire hazards.
At LBX Lighting Inc., we understand that safety enables us to truly enjoy our lighting solutions. Proper lighting improves our mood and creates wonderful memories, but only when installed safely. For insights into creating both safe and effective lighting environments, explore Why Good Lighting is Important in Your Home and for Your Mood.
Common Challenges and Troubleshooting Tips
Even the most carefully planned how to build a christmas light control system project will present challenges. The good news is that most issues follow predictable patterns with straightforward solutions.
When lights aren’t working at all, we start with the basics. Physical connections top our troubleshooting list – loose wires cause more problems than any other single factor. We double-check that every wire is securely fastened and look for any shorts between conductors.
Data direction catches many first-time builders. Pixels only work in one direction! The data must flow from our controller’s output to the “data in” side of our first pixel, then from “data out” of each pixel to “data in” of the next. Getting this backwards results in completely dark strands.
We verify our power supply is actually providing the correct voltage under load. Sometimes a power supply that measures correctly with no lights connected will sag dramatically when we add our full pixel load.
Flickering lights or incorrect colors usually point to power problems. Power injection issues cause the majority of these symptoms, especially with 5V systems or long pixel strands. We check that power injection is correctly implemented and measure voltage at the end of our strings – anything more than a 0.5V drop indicates insufficient power delivery.
Data signal noise becomes problematic on longer runs. Adding a 220-ohm resistor in series with the data line right at our controller’s output often solves mysterious flickering. We keep data extension cables under 50-60 feet and ensure they’re properly wired to minimize noise pickup.
Network issues like controllers not being found or IP conflicts require systematic troubleshooting. We double-check our controller’s IP address and ensure it falls within our network’s range. The “ping” command from our computer confirms basic network communication.
Static IP versus DHCP settings sometimes conflict with other network devices. Reserving our controller’s IP address in our router’s DHCP settings prevents conflicts while maintaining easy network management.
For WiFi controllers, signal strength at the installation location often determines reliability. A WiFi extender or dedicated access point can solve connectivity problems that seem mysterious until we check signal strength.
When controllers freeze or lights stop animating, we look at power quality first. Arduino-based controllers need adequate voltage – around 7V works well. If we’re sharing a power supply between lights and controller, a buck converter steps down voltage appropriately for the Arduino.
Overheating affects both controllers and power supplies, especially in enclosed spaces. Adequate ventilation prevents thermal shutdowns, and some components like H-bridges benefit from small heatsinks.
How to build a christmas light control system for future growth
Building a scalable system from the start makes expansion much easier in future years. The beauty of modern pixel-based displays lies in their inherent expandability.
Scalability built into protocols like E1.31 means we can start small and grow dramatically. A first-year display with a single controller and a few hundred pixels can evolve into a multi-thousand pixel spectacular over several seasons. Each component we choose should support this growth path.
Adding more controllers becomes straightforward when we need to expand beyond our original capacity. Each new controller gets its own IP address and integrates seamlessly into xLights. This modular approach means we’re never limited by our initial hardware choices.
For truly large displays spanning wide areas, a master/slave setup provides perfect synchronization. One Raspberry Pi running FPP acts as the master, coordinating playback across multiple slave devices and controllers throughout our property.
Custom props and coro shapes let us create unique elements that set our display apart. We can design and build custom props using PVC pipe or corrugated plastic (“coro”). The DIY community constantly shares new prop designs, and specialized vendors offer pre-cut shapes that make expansion incredibly easy.
Looking toward the future, we can explore integrating with smart home lighting systems. While more advanced, this integration opens possibilities for automated scheduling and year-round lighting control that extends well beyond the holiday season.
At LBX Lighting Inc., we’re always exploring Innovative Lighting Solutions that push creative boundaries. Whether integrating with smart home platforms or developing custom controls, we help you achieve your vision for comprehensive Smart Home Lighting solutions.
Frequently Asked Questions about DIY Light Shows
How much does it cost to build a DIY Christmas light show?
The wonderful thing about learning how to build a christmas light control system is that you can start as small or as big as your budget allows. I’ve helped countless homeowners steer this question, and the answer really depends on your vision and how elaborate you want to go.
If you’re just dipping your toes in the water, you can create a basic system using an Arduino with some relays to control traditional lights for under $50. It’s a great way to test the waters without a huge investment.
For those ready to jump into addressable LEDs, a small starter show with a few hundred pixels makes a fantastic first project. Using an ESP8266-based DIY controller like ESPixelStick, you can build an impressive display for under $200. This budget covers your controller, power supply, and several strands of colorful pixels that can dance to music.
As your passion grows (and trust me, it’s addictive!), you might find yourself eyeing more sophisticated equipment. A SanDevices E682 16-port controller kit runs around $109, while the popular Falcon F16V3 controller costs about $200. These professional-grade controllers open up possibilities for much larger displays.
The sky’s really the limit for elaborate installations. Large displays with thousands of pixels, multiple commercial-grade controllers, and custom-fabricated props can easily reach several thousand dollars. But here’s the beauty of DIY – you can build incrementally, adding new elements each year and spreading the cost over time.
How long does it take to set up a synchronized light show?
Planning a light show is like planning a wedding – the earlier you start, the less stressed you’ll be! I always tell my clients to begin thinking about their display in January or February to take advantage of component presales and avoid the holiday rush.
The hardware assembly phase typically takes several weekends, depending on how many elements you’re adding. Don’t let this intimidate you though – some projects move faster than you’d expect. Our research shows that building a stunning 13-foot pixel megatree, often the crown jewel of many displays, takes just over 4 hours. Not bad for such an impressive centerpiece!
The real time investment comes in sequencing – creating those magical animations that make your lights dance to music. If you’re crafting a custom sequence from scratch, expect to spend dozens of hours on a single song. Every flash, fade, and color change needs to be perfectly timed to the music.
Here’s where the DIY community really shines. Generous enthusiasts share pre-made sequences through xLights forums and Google Drive, dramatically reducing your time investment. Using these shared sequences means you can have a full show running much faster while still creating something spectacular for your neighborhood.
From initial concept to flipping the switch on your first show, plan on several months for the complete journey of planning, ordering components, building, and sequencing.
Can I control traditional, non-addressable Christmas lights?
Absolutely! While addressable LEDs get most of the attention these days, you can still create impressive synchronized shows with traditional Christmas lights. Many of our clients start this way before eventually upgrading to pixels.
The approach is different but equally effective. Instead of pixel controllers, you’ll use relay control with a microcontroller like an Arduino paired with a relay board. Think of relays as electrically controlled light switches – your Arduino tells each relay when to turn its connected lights on or off.
This method gives you channel-based control rather than individual bulb control. For example, all the lights outlining your windows might connect to one relay, while your roofline lights connect to another. You can create dramatic chasing effects, synchronized flashing, and musical timing, even though you can’t change colors or control individual bulbs.
For more sophisticated control of traditional lights, “Renard” dimmers offer a classic DIY solution. These provide dimming capabilities beyond simple on/off control, allowing you to create smooth fades and more nuanced lighting effects with your existing AC lights.
While you won’t achieve the rainbow of colors possible with addressable LEDs, traditional light control systems can still create memorable shows that will delight your neighbors and give you valuable experience before potentially upgrading to a full pixel system.
Conclusion: Your Home, The Star of the Neighborhood
Congratulations! You now have everything you need to transform your home into the neighborhood’s most spectacular holiday destination. How to build a christmas light control system no longer seems like an impossible dream, does it? What once required expensive professional installations can now be achieved in your own garage with components that cost less than a fancy dinner out.
The journey we’ve taken together – from understanding the basic components to sequencing your first musical masterpiece – represents years of collective wisdom from the DIY lighting community. You’re not just building a light show; you’re joining a passionate group of makers who share ideas, troubleshoot problems together, and celebrate each other’s successes.
Start small and dream big. That simple advice has guided countless successful displays. Your first year might feature a modest roofline outline and a small megatree. But next year? Perhaps you’ll add those custom coro shapes, expand to the backyard, or even coordinate with your neighbors for a street-wide spectacular. The beauty of this hobby lies in its endless potential for growth.
Every expert was once a beginner. Those jaw-dropping displays that inspired you to start this journey? They began with someone just like you, wondering if they could really make lights dance to music. The answer, as you now know, is absolutely yes.
The technical skills you’ve learned extend far beyond Christmas lights. You’ve gained experience with networking protocols, power management, weatherproofing electronics, and creative sequencing. These skills open doors to year-round projects and applications you might never have imagined.
Safety remains your top priority as you bring your vision to life. Take your time with connections, double-check your power calculations, and never rush when working with electricity. A safe display is a display you can enjoy for years to come.
At LBX Lighting Inc., we understand that lighting is about more than just illumination – it’s about creating experiences and memories. Whether you need guidance on power supplies for your DIY project or you’re ready to explore permanent Residential Lighting Solutions, our Houston-based team brings decades of expertise to every conversation.
As your display grows and evolves, you might find yourself wanting to integrate professional-grade components or explore more sophisticated Lighting Control Systems. We’re here to help bridge that gap between DIY enthusiasm and professional installation, ensuring your lighting dreams become reality.
Your neighbors are in for a treat this holiday season. That first night when you flip the switch and watch your creation come alive – synchronized, colorful, and perfectly timed to your favorite holiday song – you’ll understand why so many people fall in love with this hobby.
Welcome to the wonderful world of DIY Christmas lighting. Your home is about to become the star of the neighborhood, and the magic you create will bring joy to countless families for years to come.


