Light Up Your Life: A Simple Guide to Installing Recessed Ceiling Lights
September 25, 2025
Building a Christmas Light Controller: The Engineer’s Guide to Holiday Magic
September 27, 2025
Why Restore a Vintage Lamp?
Vintage lamp restoration is the process of breathing new life into old lighting fixtures by cleaning, repairing, and updating their electrical components while preserving their original charm and character.
Quick restoration overview:
- Assess the lamp – Check wiring, socket, base condition, and shade
- Gather tools – Screwdrivers, wire strippers, cleaning supplies, replacement parts
- Rewire safely – Replace old cord and socket with UL-certified components
- Restore finishes – Clean metal, remove rust, apply protective coatings
- Repair shade – Clean or restore fabric, fiberglass, or glass shades
- Test thoroughly – Ensure all connections are secure before use
There’s something magical about changing a tarnished, forgotten piece into a stunning focal point for your home. As one restoration enthusiast put it: “Antique lamps are more than just sources of light; they are windows to the past, each with its own unique story to tell.”
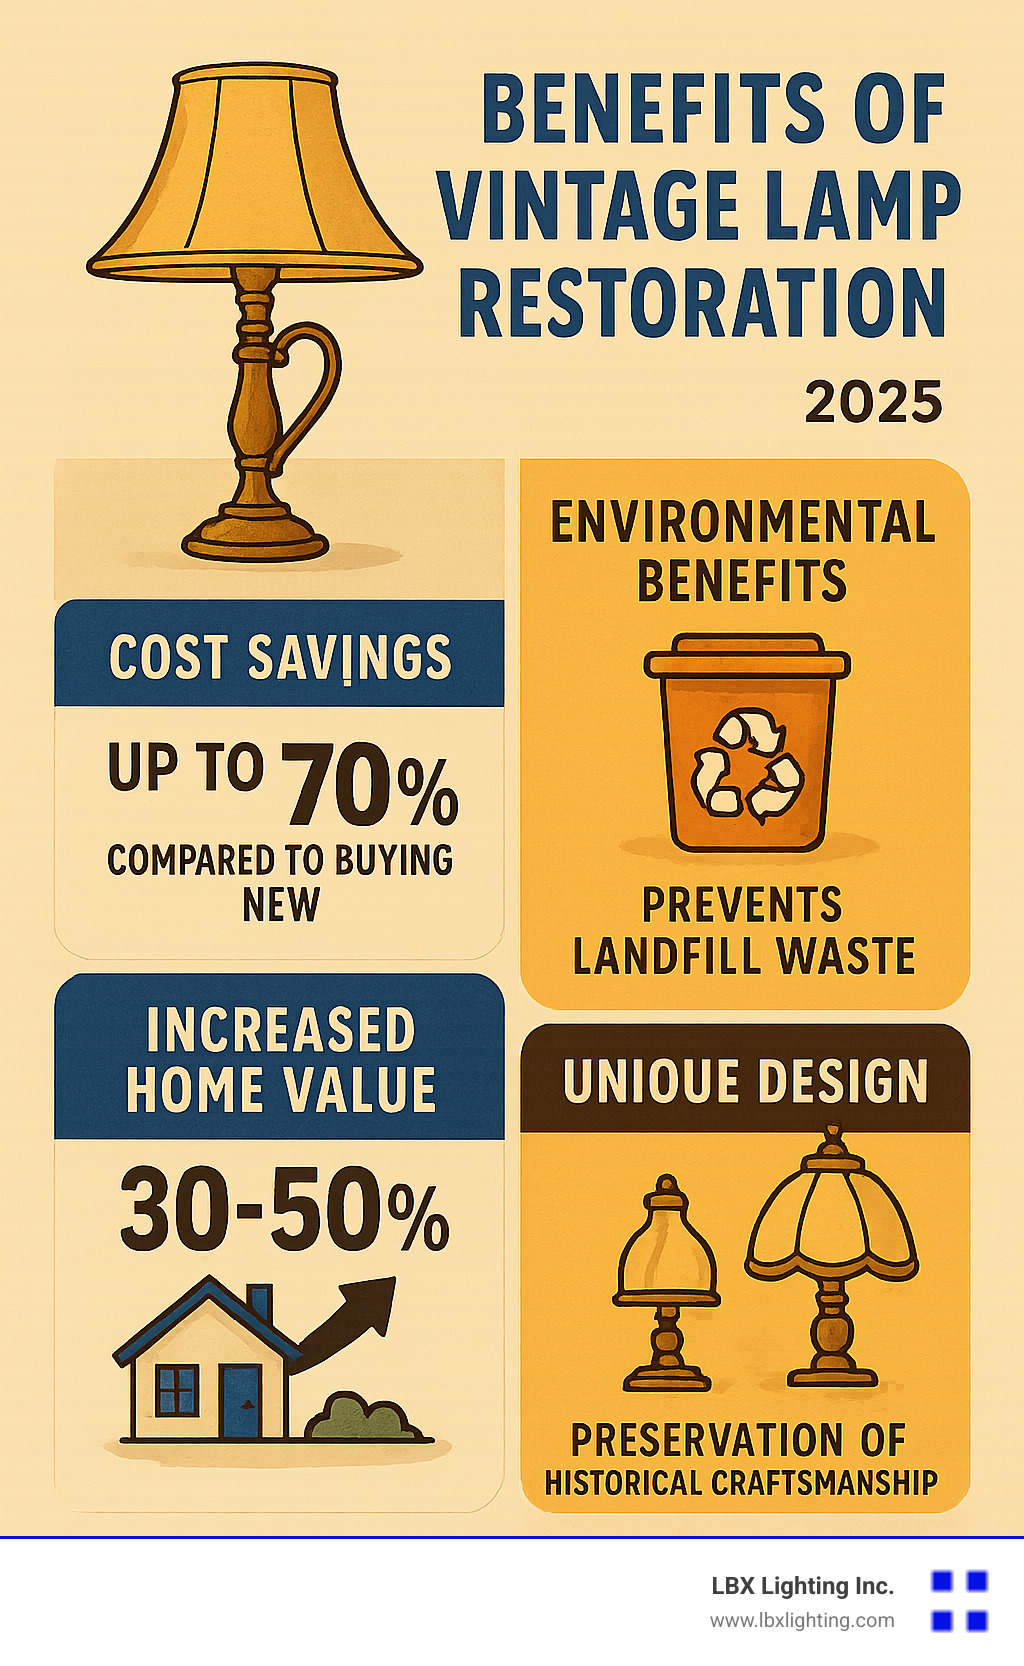
The rewards go beyond aesthetics. Restoring vintage lamps can increase their value by 30-50%, depending on rarity and condition. You’re also making an eco-friendly choice – with 65% of consumers now preferring to restore existing items rather than buy new. Plus, DIY restoration can save you up to 70% compared to buying professionally restored pieces.
These vintage fixtures offer unique design elements you simply can’t find in modern mass-produced lighting. From intricate brass work to hand-blown glass shades, vintage lamps bring character and craftsmanship to any space.
I’m Michael Eftekhar, and for over 30 years, I’ve helped Houston residents find the perfect lighting solutions for their homes and businesses. Through decades of experience with vintage lamp restoration and lighting repair, I’ve seen how the right approach can transform even the most neglected fixtures into treasured pieces.
Getting Started: Assessment and Preparation
Before diving into your vintage lamp restoration project, let’s take a moment to really understand what we’re working with. Think of this as getting to know an old friend – every vintage lamp has its own personality and quirks that come with decades of faithful service.
Common Issues with Vintage Lamps
Most vintage lamps arrive at our workbench with a collection of age-related issues that need some TLC. Frayed or brittle cords top the list – those old cloth-covered wires might look charming, but cracked insulation creates serious electrical hazards that we absolutely need to address.
Faulty switches are another frequent culprit. After years of faithful service, these mechanisms can become stiff, unreliable, or give up entirely. You might find yourself jiggling the switch just to get a flicker of light – a sure sign it’s time for replacement.
The aesthetic issues are just as important to tackle. Tarnished metal components can hide a lamp’s true beauty under layers of oxidation and neglect. Brass develops that dark, cloudy patina while iron succumbs to rust, both obscuring the original craftsmanship underneath.
Damaged sockets present both functional and safety concerns. These can crack, corrode, or work themselves loose over time, preventing proper electrical connections. Similarly, loose connections inside the lamp body can cause frustrating intermittent power issues or complete failure.
Don’t forget about damaged lampshades – they often suffer from dents, tears, stains, or warped frames that affect both appearance and light distribution. Finally, structural instability in the base or threaded pipes can make your beautiful lamp wobble dangerously.
Assessing Value and Deciding on Restoration
Here’s the big question: “Is this lamp worth restoring?” If it holds sentimental value as a family heirloom, the answer is always yes. But beyond emotional attachment, we look at several practical factors.
Unique design is a major consideration. Does your lamp have distinct styling, intricate details, or an unusual form that sets it apart from modern mass-produced lighting? Research shows that about 70% of consumers value the aesthetic appeal and unique design of vintage lighting when making purchasing decisions.
Quality materials make excellent restoration candidates. Lamps crafted from solid brass, fine porcelain, crystal, or quality wood are often worth the investment. These materials age beautifully and can be restored to their original luster.
Consider the rarity or historical significance of your piece. Art Deco lamps, Mid-Century Modern designs, or pieces from notable manufacturers carry extra value that justifies restoration efforts.
Most importantly, examine the condition of the base and body. Even if the wiring is completely shot, a solid, beautiful foundation gives you an excellent starting point for your vintage lamp restoration project.
For complex electrical issues, significant structural repairs, or when you’re not comfortable working with electricity, professional help is always the smart choice. Our team at LBX Lighting offers expert lamp repair services for those challenging projects that need specialized attention.
Essential Tools and Materials
Success in any restoration project starts with having the right tools and materials at hand. For vintage lamp restoration, you’ll need a mix of common household items and specialized electrical tools.
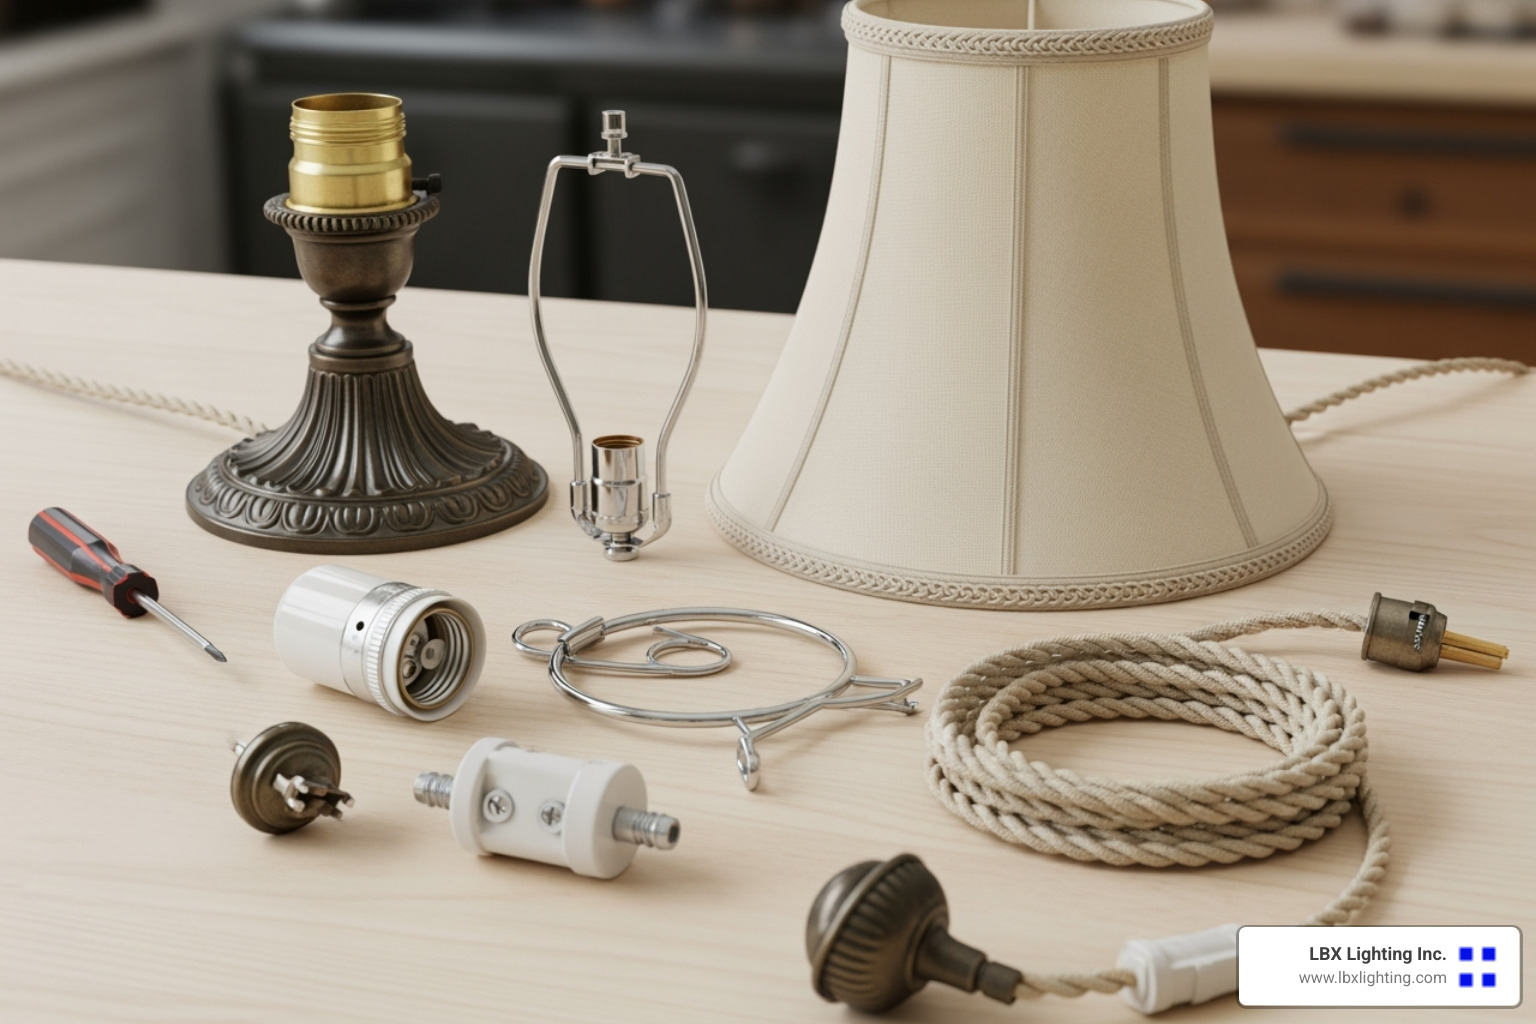
Your essential tools include basic screwdrivers (both flathead and Phillips), wire strippers and cutters, regular and needle-nose pliers, and safety glasses for protection. A multimeter is crucial for testing continuity and voltage – don’t skip this safety essential. You’ll also need cleaning brushes, sandpaper in various grits, and a metal file for rust removal.
For essential materials, start with UL-certified replacement components: lamp cord (typically 18-2 gauge), a new socket that matches your lamp’s style, and a replacement plug if needed. Stock up on cleaning agents like mild dish soap, metal polish for brass or copper components, and protective lacquer to seal your finished work.
Choosing the Right Replacement Parts
Selecting correct replacement parts ensures both safety and authenticity in your restoration. Sockets come in various styles – push-through, turn-knob, or pull-chain – so choose one that matches your lamp’s original function and aesthetic. Always insist on UL-certified components for safety.
Cord selection matters more than you might think. Standard lamp cord is 18-2 gauge, but you can choose between modern plastic-covered cords (SPT-1 or SPT-2) or historically accurate cloth-covered options. SPT-1 easily slips through 3/8″ lamp pipe, while SPT-2 offers thicker insulation. Brown or gold cloth-covered cords were authentic choices for early electric lighting and significantly improve the vintage appearance.
Harps and finials complete the functional elements. The harp (wire frame supporting the shade) comes in different heights, so measure your lampshade for proper placement and light distribution. Finials – those decorative knobs securing the shade – can often be reused if intact, or replaced with period-appropriate alternatives.
Matching your lamp’s era whenever possible maintains authenticity. This might mean sourcing vintage-style plugs or specific socket finishes that complement the original design.
Most importantly, UL-certified parts are non-negotiable for safety. This certification means components have passed rigorous safety testing – never compromise on this standard.
If you need guidance on shade styles or unique replacements, our lamp shade store in Houston can help you find the perfect match for your restored treasure.
The Core of Your Vintage Lamp Restoration: Safe Rewiring
Here’s where the real magic happens! Rewiring is often the most critical step in vintage lamp restoration, changing a potentially dangerous antique into a safe, functional lighting fixture that you can actually use and enjoy. I can’t stress this enough – electrical safety comes first in every project we tackle.
Electrical Safety First
Before you even think about touching a wire, make sure that lamp is completely unplugged from the power source. I know it sounds obvious, but you’d be surprised how many people skip this crucial step! Remove the light bulb too – trust me, your fingers will thank you later.
Here’s a pro tip that’s saved me countless headaches over the years: take plenty of reference photos as you disassemble everything. Your phone camera is your best friend during this process. Snap pictures of how wires are routed, where each component sits, and how everything connects together. When you’re staring at a pile of parts later wondering “where does this go?”, you’ll be grateful for those photos.
Make detailed notes about the original wire connections and routing path. This roadmap will be invaluable when you’re putting Humpty Dumpty back together again.
Disassembly Process
Every lamp has its own personality, so the disassembly process varies depending on what you’re working with. Generally speaking, we work from the top down – it’s like undressing the lamp layer by layer.
Start by removing the finial, lampshade, and harp. Next comes the socket shell, which usually either snaps or screws off. Inside that shell, you’ll find the old wiring connected to the socket terminals. Loosen those screws carefully and unwind the wires – no yanking or pulling!
Now we work our way down the lamp’s body. Many vintage lamps have threaded pipes running through their center that hold all the decorative elements in place. Unscrew nuts and separate components methodically, always referring back to those photos you took. The old cord typically pulls out from the base once everything is loosened up.
A Step-by-Step Guide to Rewiring
Now for the exciting part – breathing new electrical life into your vintage treasure! While every lamp has its quirks, the basic rewiring steps follow a similar pattern. If you’re a visual learner, this detailed guide on lamp restoration offers excellent step-by-step photos.
Removing the old socket and cord is your first task. With everything safely unplugged, carefully remove the outer shell of that old socket. Inside, you’ll see two wires connected to two screws – loosen these screws and remove the wires. Pull the old cord out from the lamp’s base. If that cord looks brittle, cracked, or feels stiff, it’s definitely time for retirement!
Feeding the new cord through the lamp can be tricky, especially with taller or more intricate pieces. Start by feeding your new lamp cord up through the base and body. Here’s a trick I’ve used for decades: straighten out a coat hanger or grab a long skewer to guide the wire through the internal pipe. Push it from top to bottom, tape your new cord to the end, and pull it back up through the lamp.
The Underwriter’s knot (UL knot) is absolutely crucial for safety – don’t skip this step! Before connecting anything to the socket, tie this special knot at the end of your cord. This knot acts as strain relief, preventing wires from pulling away from socket terminals if someone accidentally tugs the cord. It’s a simple step that could prevent a dangerous situation.
Connecting wires to the new socket requires attention to detail. Most lamp cords have one smooth wire and one ribbed wire. The smooth wire is your “hot” (live) wire, while the ribbed wire is “neutral.” Inside your socket, you’ll find two terminals: a brass-colored screw and a silver-colored screw. Remember this simple rule: hot wire goes to brass, neutral wire goes to silver. Wrap those wire ends around the screws clockwise (like making a backward J) and tighten securely for a solid connection.
Reassembling the socket is the final electrical step. Carefully push the internal socket mechanism back into its insulating sleeve, then into the outer socket shell. It should snap or click into place with a satisfying sound. Double-check that the switch mechanism lines up correctly – nobody wants a wonky switch!
Assembling and Tightening the Lamp Body
With your new wiring safely in place, it’s time to put your lamp back together and make sure it’s rock-solid stable. A wobbly lamp isn’t just annoying – it’s a safety hazard waiting to happen.
Securing the base starts from the bottom up. Thread that new cord through the lamp’s base and secure any nuts or washers that hold the base components together. Take your time here – a solid foundation makes everything else easier.
Tightening threaded pipes requires a gentle but firm touch. As you stack the lamp’s decorative and structural elements, ensure all threaded pipes and connections are properly tightened. Many lamps have a long threaded rod running through their center, secured by nuts at various points. Tighten these firmly, but don’t go overboard – especially with glass or ceramic components that could crack under too much pressure.
Ensuring stability means checking your work as you go. Give the lamp a gentle test periodically during reassembly. If something feels loose or wobbly, address it right away. Make sure that new cord isn’t getting pinched between components.
Checking for loose parts is your final quality control step. Give the assembled lamp a gentle shake and thorough visual inspection. Everything should feel solid and secure. If you hear rattling or see movement where there shouldn’t be any, track down the culprit and tighten things up.
Once your lamp’s structure is solid and the wiring is complete, you can start envisioning how this revitalized piece will improve your home’s ambiance. For inspiration on incorporating your newly restored treasure into your decor, check out our guide on decorating with lamps.
Bringing Back the Shine: Restoring Metal and Finishes
The aesthetics of a vintage lamp are just as important as its functionality. Restoring the metal components and choosing the right finish can truly transform a forgotten piece into a stunning showstopper.
When we approach the finish of a vintage lamp restoration, we face an exciting decision: preserve the lamp’s aged character or give it a completely fresh look. Both approaches have their charm and place in modern homes.
Aesthetic Considerations
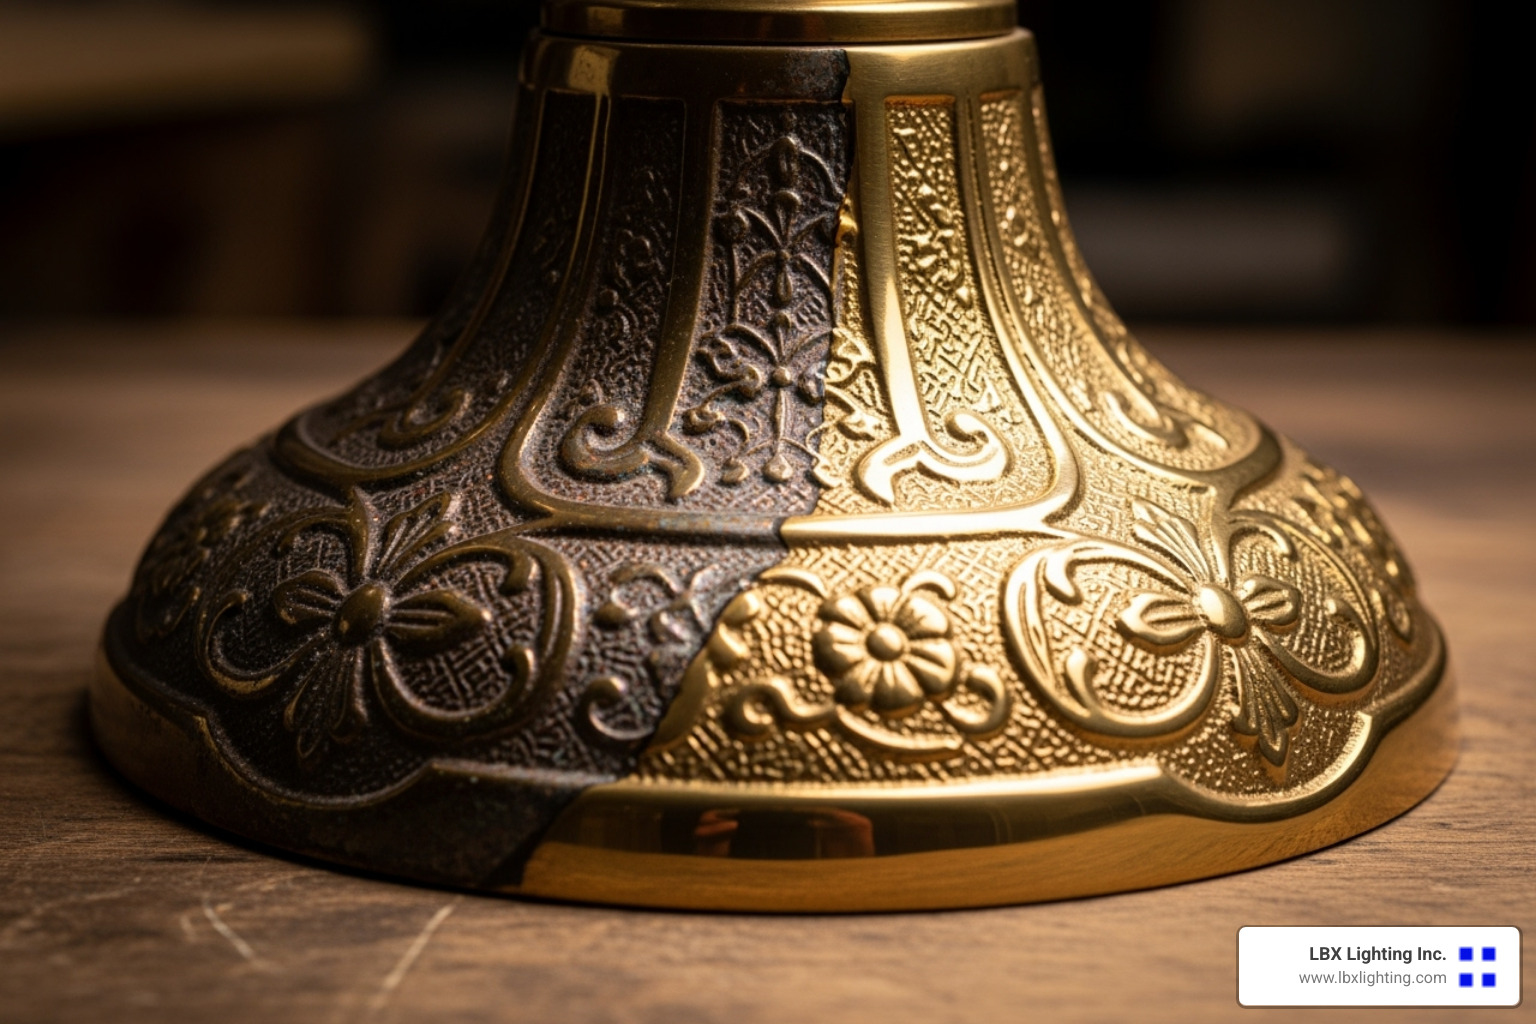
Sometimes that darkened patina tells a beautiful story. For lamps with naturally aged bronze or brass finishes, the patina adds authenticity and character that you simply can’t buy new. We might choose to clean gently around it, removing only the heaviest buildup while preserving the lamp’s historical charm.
Other times, a lamp has suffered too much damage or neglect for patina preservation to make sense. Heavily tarnished pieces often benefit from a complete restoration to their original bright finish. We can even reinvent the lamp entirely with a bold new color that fits perfectly with contemporary decor.
The key is matching our restoration approach to both the lamp’s condition and our design goals. A lamp destined for a traditional study might keep its aged brass patina, while one heading to a modern living room might shine with fresh polish or even a sleek black finish.
How to Clean and Restore Tarnished Metal
Understanding your lamp’s metal composition makes all the difference in choosing the right restoration approach. The simple magnet test tells us everything we need to know: if a magnet sticks to the lamp, it’s brass-plated over steel or iron. If it doesn’t stick, we’re working with solid brass.
This distinction matters because aggressive polishing can strip the thin brass plating right off, leaving us with exposed steel underneath. Solid brass, on the other hand, can handle more intensive cleaning without damage.
For solid brass pieces, we love using a homemade cleaning paste that works amazingly well. Mix half a cup of white vinegar with one teaspoon of salt, then sprinkle in flour until you get a thick paste. Apply this mixture with a microfiber cloth or stiff brush, scrub with some elbow grease, let it sit for a few minutes, then scrub again and rinse thoroughly.
Commercial cleaners like Brasso work well too, though many of us find satisfaction in the homemade approach. For stubborn green corrosion (called verdigris), we might need specialized treatments or multiple cleaning sessions.
Iron lamps with rust need a different approach entirely. We start by applying WD-40 or rust-penetrating oil to the affected areas. After it sits and penetrates, we use progressively finer sandpaper or steel wool to scrub away the rust. Start with coarser grits for heavy rust, then move to finer ones for smoothing.
Once the metal is clean, polishing brings back that beautiful shine. We work in small sections with a soft cloth and quality metal polish, buffing until we achieve the desired luster.
Applying protective lacquer is our secret weapon against future tarnishing. This clear coating creates a barrier against oxidation, keeping that fresh-polished look much longer. If the original lacquer has broken down and looks splotchy or peeling, we remove it completely before applying fresh protection.
Tips for a Successful Vintage Lamp Restoration Finish
Getting that professional-looking finish requires patience and the right technique, but the results are absolutely worth it.
Spray painting gives us the smoothest, most even finish, especially on intricate metalwork. The secret is applying multiple thin coats rather than trying to cover everything in one thick application. Each layer needs to dry completely before the next one goes on, preventing drips and creating a more durable finish.
Good primer makes all the difference in paint adhesion and longevity. We always use quality spray-on metal primer before any paint, even if we’re just changing from one color to another.
Color choice can completely transform a lamp’s personality. We can stick with classic metallic finishes like polished brass or antique bronze to maintain the vintage feel. Or we can go bold with contemporary colors that give the lamp an entirely new life in modern settings.
The goal is creating a piece that not only looks stunning but also complements your room’s overall design. A beautifully restored vintage lamp becomes both functional lighting and a conversation piece that adds character to any space. For more ideas on how lighting choices can transform your home’s atmosphere, check out our guide on overlooked lighting tips that serve to improve a room.
The Crowning Glory: Repairing Your Lampshade
A lampshade can make or break your vintage lamp restoration project. Even the most beautifully restored base won’t look its best with a damaged, stained, or warped shade. The good news? Many lampshade issues are surprisingly fixable with a little patience and the right approach.
Assessing Shade Damage
Before we grab our cleaning supplies, let’s take a good look at what we’re dealing with. I always tell my customers to examine their lampshades in bright natural light – you’d be surprised what you might miss under artificial lighting.
Dents and dings are especially common in metal or fiberglass shades from the mid-century era. These not only look unsightly but can also create uneven light patterns that affect the lamp’s functionality.
Tears and rips in fabric or paper shades might seem like deal-breakers, but many are actually repairable. Even small holes can often be mended invisibly with the right technique.
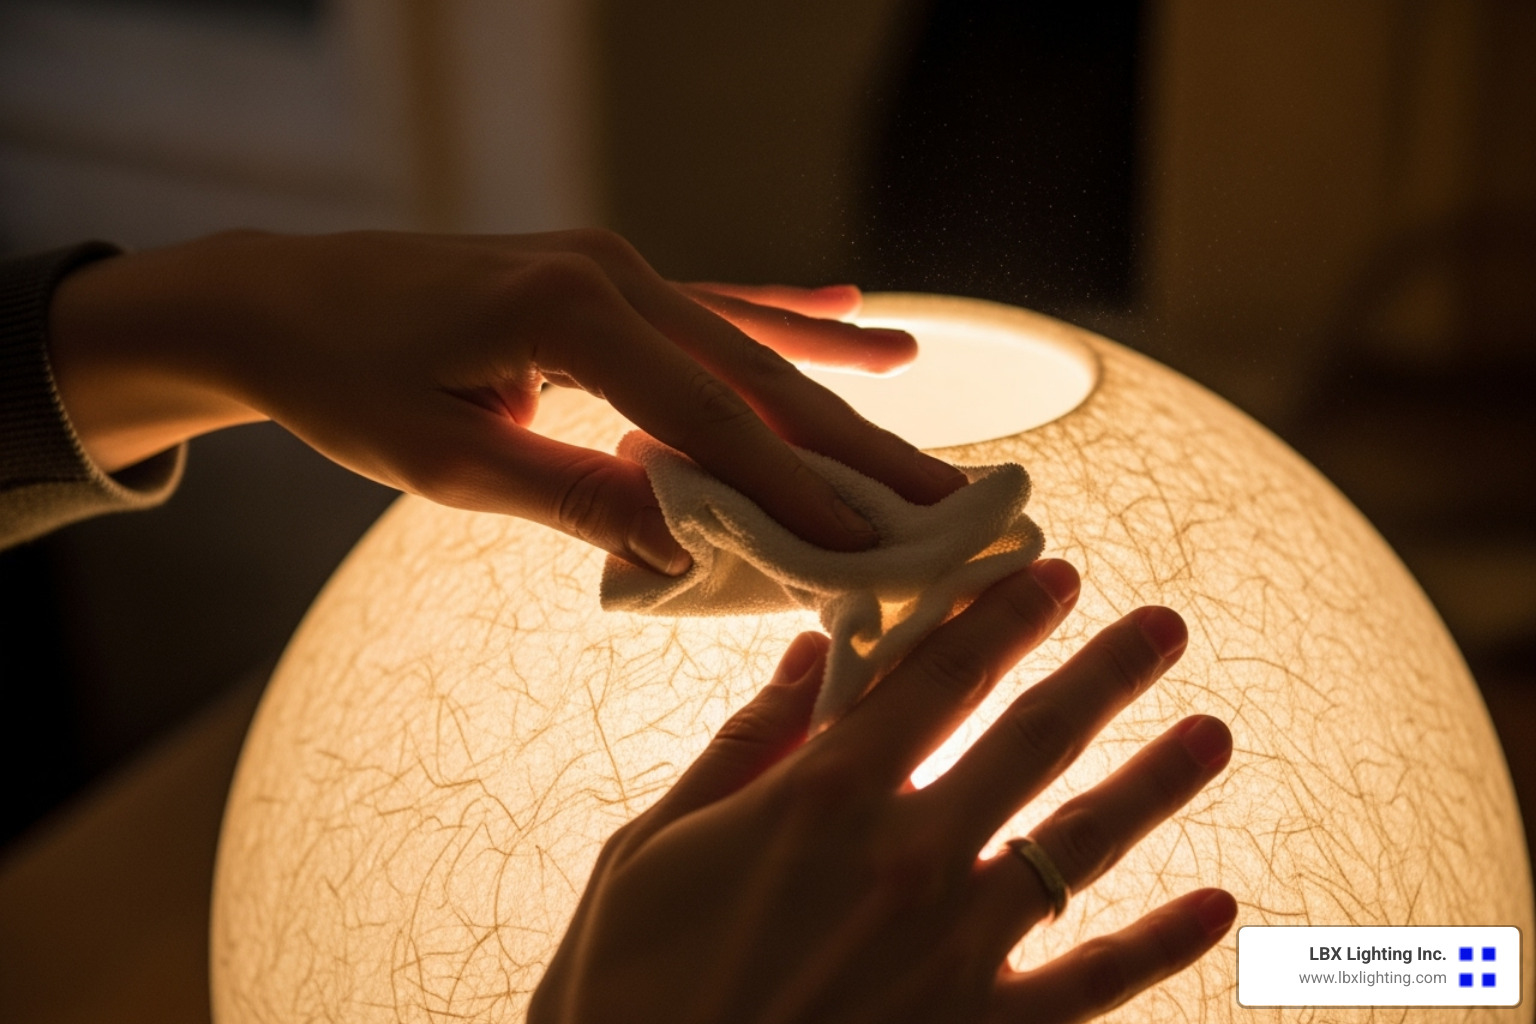
Stains and discoloration tell the story of a lamp’s life – dust accumulation, nicotine from smoking, or just the natural aging process. What looks like permanent damage is often just surface grime that responds well to proper cleaning.
Warped or bent frames can make even a clean shade look droopy and sad. The wire frame gives the shade its structure, and when it’s compromised, the entire appearance suffers.
Finally, loose or damaged trim like decorative lacing, braid, or fringe can make an otherwise good shade look shabby. The good news is that trim is usually the easiest element to repair or replace.
Cleaning and Repairing Different Shade Materials
The key to successful shade restoration is matching your approach to the material. What works beautifully on one type of shade can completely ruin another.
Fabric shades require the most delicate touch. For antique or delicate fabrics, professional dry cleaning is often your safest bet. It removes dust and light stains without risking damage to the material or the adhesives holding everything together.
For sturdier fabrics like cotton or linen (especially those without delicate trim), gentle hand washing can work wonders. I recommend using your bathtub with mild detergent and lukewarm water. Immerse the shade, gently agitate the water, rinse thoroughly, then air dry completely. Turn it occasionally as it dries to maintain its shape. The key word here is gentle – aggressive scrubbing can damage fabric or loosen adhesives.
Small tears in fabric don’t have to mean the end of your shade. Use fabric glue or a very fine needle and thread for invisible repairs. Loose trim or braiding can be re-attached with strong, clear fabric adhesive.
Fiberglass shades were the height of fashion in the 1950s and 60s, offering that distinctive warm glow that’s impossible to replicate with modern materials. They often featured decorative lacing along the edges that adds to their vintage charm.
For cleaning fiberglass, there’s a specific technique that works best. Create a foam by whipping a small amount of detergent (like All Small and Mighty) with water. Scoop the foam onto a sponge and carefully wipe the fiberglass, always moving in the direction of the grain to avoid roughing up the surface. This prevents that scratched look that can ruin the shade’s appearance.
After cleaning, rinse with warm water and lay the shade flat on a towel to dry. For larger fiberglass sheets, try clipping them with a skirt hanger and hanging them in your shower – it’s surprisingly effective! You can find detailed guidance on restoring a fiberglass lampshade that walks you through the entire process.
If the lacing on your fiberglass shade is damaged, carefully cut it off and remove any old glue residue. New lacing made from leather, plastic, or fabric cord can give your shade a fresh look while maintaining its vintage character.
Reshaping bent frames is often simpler than it looks. Many minor bends can be gently corrected by hand. For more stubborn problems, careful use of pliers might be necessary, but always be mindful of solder joints – they’re easier to break than you might think.
If your shade frame is severely damaged, don’t despair. Sometimes the most challenging restoration projects yield the most rewarding results, and professional repair might be worth considering for particularly valuable or sentimental pieces.
Frequently Asked Questions about Vintage Lamp Restoration
After three decades of helping Houston residents with their lighting needs, I’ve heard just about every question you can imagine about vintage lamp restoration. Let me share the answers to the ones that come up most often – and hopefully ease some of your concerns along the way.
Is it safe to rewire a vintage lamp myself?
This is probably the question I get asked most, and I understand why. Working with electricity can feel intimidating, but here’s the good news: vintage lamp restoration rewiring can absolutely be safe for DIYers with basic electrical knowledge.
The key is following proper safety precautions every step of the way. Always ensure the lamp is completely unplugged before you start – I know it sounds obvious, but you’d be surprised how often people skip this crucial step. Use only UL-certified parts, and don’t forget that Underwriter’s knot (UL knot) we talked about earlier to secure your wiring connections inside the socket.
Most vintage lamp problems are actually pretty straightforward: faulty sockets, old brittle wiring, loose connections, or worn-out switches. These are all issues that a careful DIYer can handle with the right approach and patience.
That said, trust your instincts. If you’re ever in doubt about any step or feeling uncertain about the lamp’s electrical integrity, please consult a professional electrician or specialized lamp repair service. Your safety is always worth more than the cost of professional help, and there’s no shame in knowing your limits.
How do I know if a vintage lamp is worth restoring?
This question usually comes from folks standing in an antique shop or going through a relative’s belongings, wondering if that old lamp is worth the effort. Here’s how I help people think through it.
Sentimental value often trumps everything else. If that lamp sat on your grandmother’s nightstand or has been in your family for generations, it’s worth restoring regardless of its monetary value. The stories these pieces carry are irreplaceable.
From a practical standpoint, look for unique design elements that you simply can’t find in modern pieces. Is it made from quality materials like solid brass, crystal, or fine porcelain? Does it have intricate details or craftsmanship that speaks to you? Is it from a notable era like Art Deco or Mid-Century Modern?
Here’s something that might surprise you: even if the wiring is completely shot, a solid, beautiful base is still a great candidate for restoration. I’ve seen people transform the most neglected fixtures into stunning focal points that become conversation starters in their homes.
The satisfaction of bringing an old piece back to life – both aesthetically and functionally – is incredibly rewarding. You’re not just fixing a lamp; you’re preserving a piece of history and giving it new purpose in your home.
Where can I find replacement parts for my vintage lamp?
Finding the right parts can feel like a treasure hunt, but there are more options than you might think. For common components like cords, plugs, and basic sockets, your local hardware store is often a great starting point.
When you need a wider selection or more specialized items, online retailers that focus on lamp parts become invaluable. They typically carry everything from period-appropriate cloth-covered cords to specific socket styles that match your lamp’s era.
For truly unique or hard-to-find components, antique hardware suppliers can be goldmines. Sometimes you’ll find original parts that are perfect matches for your restoration project.
When all else fails – or if you prefer professional guidance from the start – a specialized lighting treasures service can often source or even fabricate custom components for your specific lamp. We’ve helped countless customers track down that one perfect piece that completes their restoration.
Don’t get discouraged if you can’t find something immediately. Part of the joy of vintage lamp restoration is the detective work involved in bringing these beautiful pieces back to life. And remember, we’re always here to help if you get stuck along the way.
Conclusion: Enjoy Your Restored Piece of History
There’s nothing quite like plugging in your newly restored vintage lamp for the first time and watching it cast that warm, welcoming glow across your room. The vintage lamp restoration journey you’ve just completed is so much more than a simple DIY project – it’s an act of preservation that connects you directly to the craftspeople who originally created this beautiful piece.
The satisfaction runs deep. You’ve taken something that was probably headed for a garage sale or worse, and transformed it into a functional work of art that will serve your family for years to come. Every time you flip that switch, you’ll remember the care and attention you put into each step of the restoration process.
Now comes the fun part – final testing and setup. Before you celebrate, let’s make sure everything is working safely. Plug in your lamp and test the switch. Listen for any unusual sounds and watch for flickering lights or sparks. Feel around the base and cord after a few minutes of use – nothing should be getting warm except the bulb itself.
Choosing the right bulb matters more than you might think. Your vintage lamp deserves a bulb that complements its character. Traditional incandescent bulbs give off that classic warm light, while modern LED bulbs offer energy efficiency and longevity. For guidance on creating the perfect lighting atmosphere throughout your home, check out our comprehensive guide on lighting your home is easy when you know how.
You’ve also made an environmentally conscious choice. By restoring instead of discarding, you’ve kept a beautiful piece out of a landfill while avoiding the environmental impact of manufacturing something new. That’s something to feel good about every time you see your lamp.
Your restored lamp is now a conversation starter – a unique piece that reflects your personal style and appreciation for quality craftsmanship. Unlike mass-produced lighting, your vintage lamp has character, history, and a story that you’re now part of.
When projects get complex, sometimes it’s wise to call in the experts. If you’re tackling a particularly challenging restoration or you’re in the Houston area and want professional assistance, our experienced team at LBX Lighting Inc. specializes in bringing vintage lighting back to life safely and beautifully. We understand the delicate balance between preserving historical character and ensuring modern safety standards. Contact us for professional lighting repair services – we’d love to help make your vintage lamp restoration vision a reality.
Welcome to the wonderful world of vintage lighting restoration. Your lamp is now ready to light up your home and your life for many years to come.


