On Track: Best Battery Operated LED Track Lighting Solutions
April 28, 2025
How to Fix a Ceiling Fan with These Quick Changes
April 30, 2025The Elegance and Practicality of Crystal Chandelier Installation
There’s something magical about walking into a room and looking up to see the dancing light of a crystal chandelier. That sparkle can transform an ordinary space into something truly extraordinary. If you’ve been dreaming of adding this touch of elegance to your home, you might be surprised to learn that installing one can be within your DIY capabilities!
Before you grab your toolbox, let’s cover the essentials of our crystal chandelier installation guide:
- Safety First: Always turn off power at the circuit breaker (not just the switch!)
- Weight Check: Verify your ceiling box can support your fixture (standard boxes handle 50-75 lbs)
- Preparation: Assemble main chandelier components before mounting
- Mounting: Secure bracket properly to your ceiling junction box
- Wiring: Connect black-to-black, white-to-white, and don’t forget that ground wire
- Final Assembly: Add crystals from inside out to prevent tangling and frustration
A well-chosen chandelier does much more than simply light up a room. It creates a stunning focal point that lifts your entire design scheme and reflects your personal style. Think of it as jewelry for your ceiling – the perfect finishing touch that brings everything together.
The right chandelier doesn’t just illuminate your space—it makes a statement about who you are and your attention to beautiful details.
I’ve seen the hesitation on customers’ faces when they fall in love with a chandelier but worry about the installation. The good news is that with proper guidance, many homeowners can successfully tackle this project. That said, knowing your limits is important. Fixtures under 50 pounds with standard wiring configurations are typically DIY-friendly, while those massive statement pieces or installations in cathedral ceilings (over 20 feet) are best left to professionals.
Hi there! I’m Michael Eftekhar from LBX Lighting Inc. Over my 30+ years in the lighting industry, I’ve guided countless homeowners and designers through the chandelier installation process. There’s nothing quite like the satisfaction of seeing a space transformed by the warm glow and sparkling beauty of a properly installed crystal chandelier.
Choosing & Assessing Your Crystal Chandelier
Let’s face it – picking the perfect crystal chandelier is exciting, but making sure your ceiling won’t come crashing down? That’s essential! Before you get swept away by all that sparkle, let’s make sure you choose a chandelier your home can actually support.
“I always tell my customers to fall in love with the chandelier second and check their ceiling structure first,” as we often say here at LBX Lighting. That dream fixture needs a proper foundation to shine its brightest.
Types at a Glance
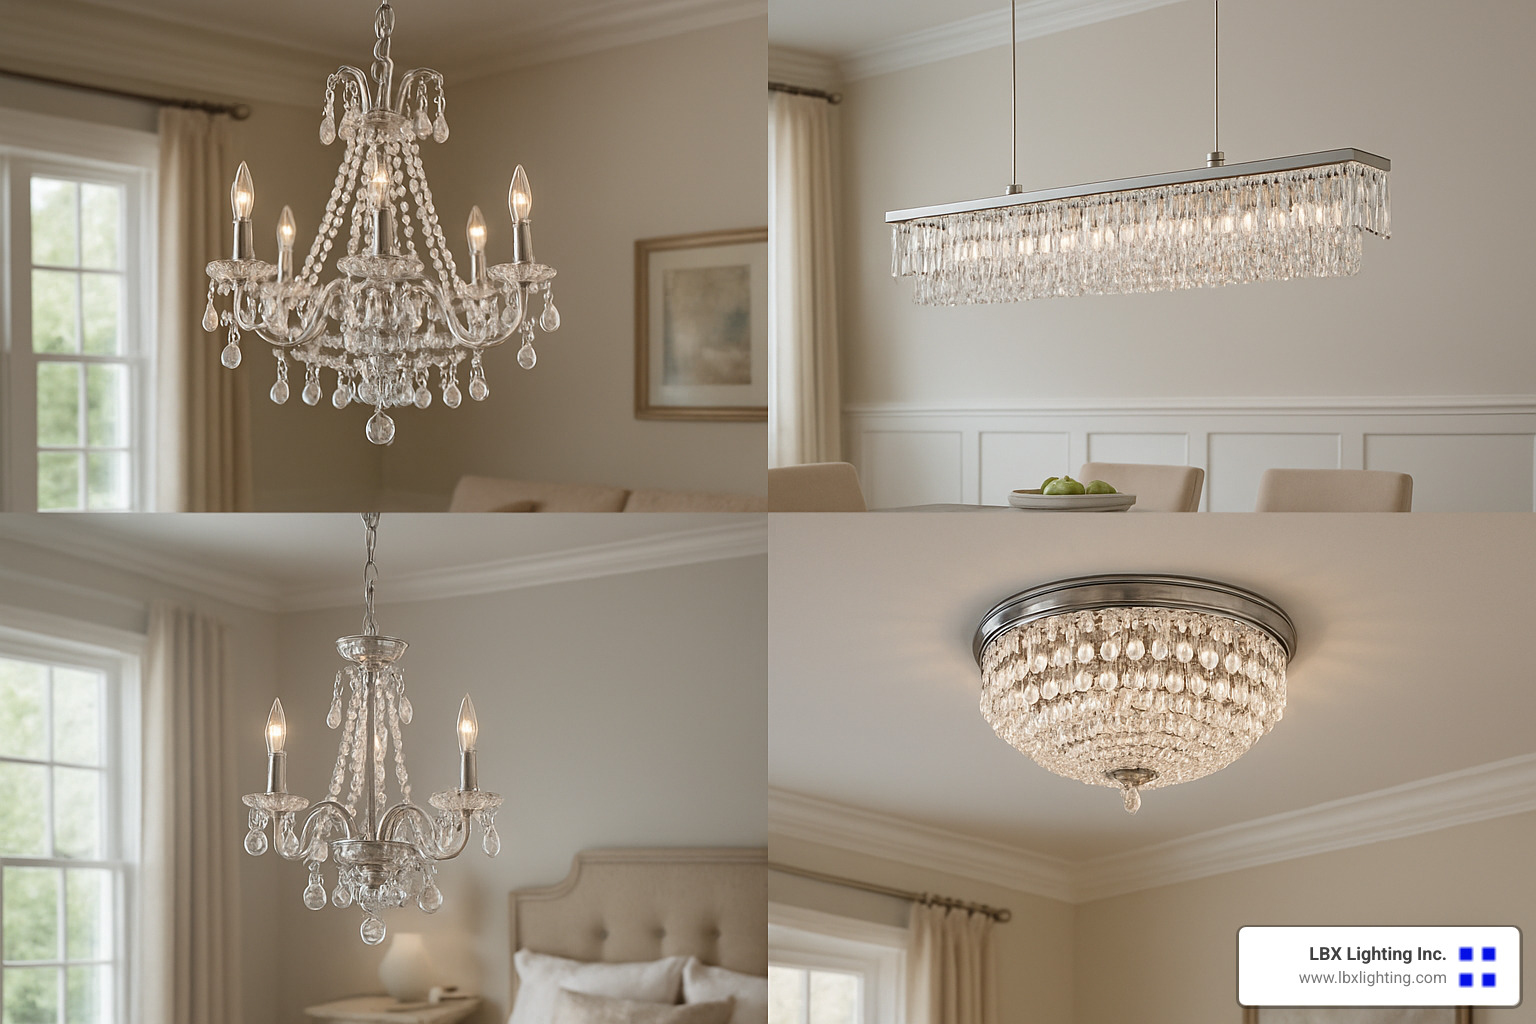
The world of crystal chandeliers offers something for every space and style. Each type comes with its own installation considerations:
Classic Tiered Chandeliers bring timeless elegance with their multiple layers of crystals. They’re often on the heavier side – many weighing over 50 pounds – which means your ceiling needs to be up for the challenge. These showstoppers create that “wow” moment when guests enter your foyer or dining room.
Modern Linear Chandeliers stretch horizontally, making them perfect for dining tables or kitchen islands. While sleek in appearance, don’t be fooled! Their weight distribution requires special attention during mounting to ensure they hang perfectly level and secure.
Mini Chandeliers offer big style in smaller packages. Typically under 20 pounds, they’re perfect for adding a touch of luxury to bathrooms, bedrooms, or intimate dining nooks without major ceiling reinforcement.
Flush-Mount Crystal Fixtures are your friends if you have lower ceilings. They hug the ceiling closely while still delivering that crystal sparkle. Installation is generally more straightforward since you won’t need to fuss with chains or rods.
Is Your Ceiling Ready?
Here’s where DIY dreams sometimes hit a reality check. That gorgeous 80-pound crystal masterpiece? Your standard ceiling box rated for 50 pounds isn’t going to cut it.
Standard ceiling electrical boxes typically support fixtures between 50-75 pounds. I’ve seen the disappointment on customers’ faces when they realize their ceiling isn’t ready for the chandelier they’ve already purchased.
If your crystal chandelier installation guide research shows your fixture exceeds your ceiling box’s rating, don’t worry! You have options:
A ceiling fan brace can be a lifesaver, supporting up to 150 pounds and usually installable without major ceiling surgery. For truly heavy fixtures (those magnificent heirloom pieces!), independent bracing directly to ceiling joists might be necessary. And if you’re dealing with a chandelier over 100 pounds or an older home with questionable ceiling integrity, investing in a consultation with a structural engineer is money well spent.
Simple math matters: A 50-pound rated box + 75-pound chandelier = potential disaster. Those UL or ETL safety certification labels aren’t just decorative – they’re crucial safety guidelines that help prevent your beautiful chandelier from becoming a dangerous falling object.
When we help customers at LBX Lighting select chandeliers, we always compare standard vs. heavy-duty ceiling boxes based on their specific needs. The right foundation makes all the difference between a stunning focal point and a ceiling repair project!
Safety Gear & Pre-Installation Checklist
Let’s face it – hanging a gorgeous crystal chandelier is exciting, but it also involves electricity and heavy objects over your head. That’s why we need to talk safety first. As we like to say at LBX Lighting, “A beautiful chandelier installation starts with smart preparation.”
Before climbing any ladder, make sure you’ve got everything you need for a smooth, safe installation process.
Tools & Materials You’ll Need
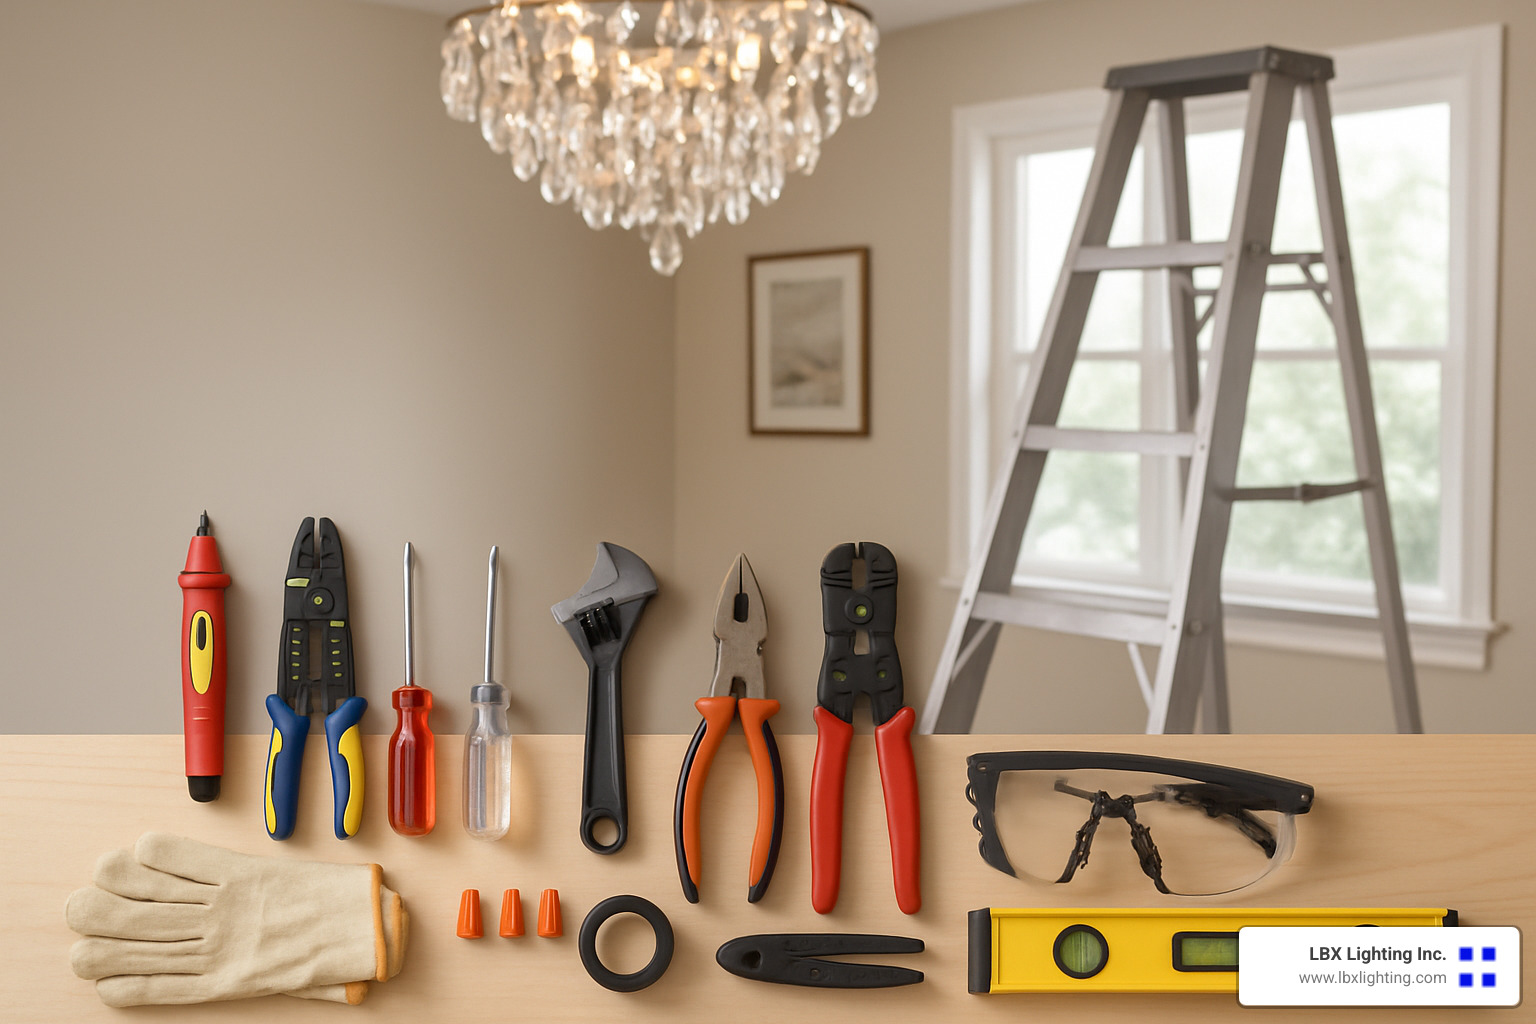
Your chandelier installation toolkit doesn’t need to be fancy, but it does need to be complete. I’ve helped hundreds of homeowners through this process, and here’s what you’ll want to gather:
For electrical work, you’ll need a reliable voltage tester (never skip this!), wire strippers for clean connections, and assorted screwdrivers for mounting hardware. Grab an adjustable wrench and pliers for securing brackets and manipulating wires.
The right ladder or step stool makes all the difference – it should be tall enough that you’re not stretching dangerously. For securing connections, have wire nuts and electrical tape on hand. If your chandelier has a chain, chain cutters will help you achieve the perfect height.
Don’t forget a level to ensure your fixture hangs straight, and soft gloves serve double duty – they protect your hands while keeping fingerprints off those beautiful crystals. Always wear safety goggles when working overhead (trust me, something always seems to fall!).
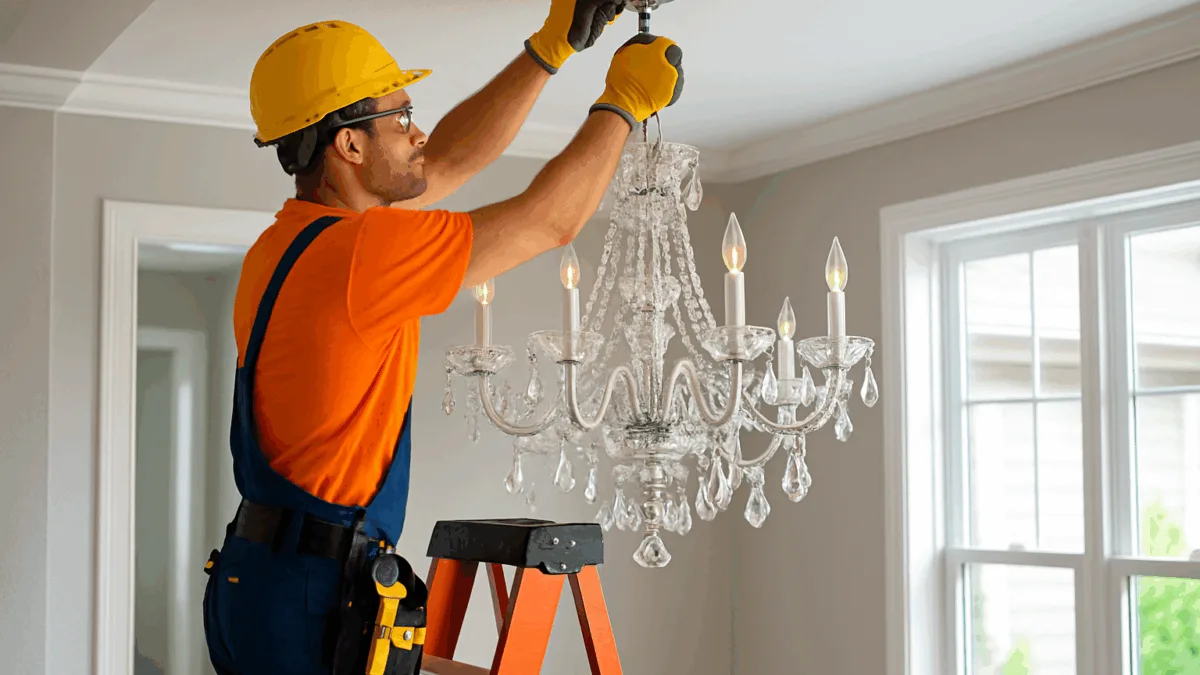
For serious safety, invest in insulated electrical gloves when handling wiring connections. If you’re working in high ceilings, a hard hat isn’t overkill – it’s smart protection. And remember, always use a non-conductive ladder (fiberglass or wood) when working with electricity – aluminum ladders can conduct current.
For extra peace of mind, keep a few spare crystals tucked away for future needs. And if you’re wondering about keeping your chandelier sparkling after installation, check out more info about cleaning methods.
Pre-Flight Inspection
Before you flip that circuit breaker, take time for a proper pre-installation check. This step saves headaches later – I promise!
First, carefully unpack and count every piece. One of our clients once told me, “I thought counting 300 crystals was overkill until I found I was missing one crucial piece!” Better to know before you’re balanced on a ladder.
Consider having an electrician test the fixture on the ground before you mount it. This simple step can reveal any shipping damage or wiring issues while fixes are still easy.
Partially assemble the chandelier at ground level to get familiar with how it goes together. This “dry run” builds confidence and helps you spot any potential issues. While you’re at it, take clear photos of your existing wiring if you’re replacing an old fixture – these photos can be lifesavers if you get confused mid-installation.
Know exactly which circuit breaker controls your lighting circuit. Nothing’s worse than having to climb down repeatedly to try different breakers! Consider using a breaker lock-out device to prevent someone from accidentally restoring power while you work.
Prepare your workspace by clearing the area below and laying down protective coverings. Crystal chandeliers have many delicate parts, and you’ll want to protect both your floor and any dropped components.
Perhaps most importantly, never install a chandelier alone. As one customer wisely noted, “My wife holding the chandelier while I connected the wires saved our marriage and our fixture!” This is especially true for chandeliers over 25 pounds – they’re simply too heavy and awkward for one person to manage safely.
Before proceeding, double-check that your ceiling can support your new crystal chandelier installation guide requirements. Standard ceiling boxes typically support 50-75 pounds, but many crystal chandeliers exceed this weight. Verify your box rating and consider additional support for heavier fixtures.
Taking time for proper preparation isn’t just about avoiding mistakes – it’s about making the entire process more enjoyable. With the right tools and preparation, you’ll be enjoying your sparkling new chandelier before you know it!
Crystal Chandelier Installation Guide: Step-by-Step
Ready to transform your space with a dazzling crystal chandelier? Now that you’ve prepared properly, let’s roll up our sleeves and walk through the installation process together. This crystal chandelier installation guide breaks everything down into manageable steps that will help ensure your chandelier hangs beautifully and safely.
Step 1 – Remove Old Fixture & Test Voltage
Safety first, always! Before touching any wires, make sure to:
Turn off power at the circuit breaker—not just the light switch. As one of our installation experts always says, “Flipping the switch off might make the light go dark, but electricity is still flowing to the fixture.” That’s a shock waiting to happen!
If possible, place a piece of tape over the breaker or use a lockout device. This prevents someone from accidentally restoring power while you’re working—trust me, your family members will forget you’re up on that ladder!
Once the old fixture is exposed, use your voltage tester on the wires to confirm there’s zero electricity flowing. This simple 10-second check can save you from a nasty shock.
Now you can safely remove the existing fixture. As you disconnect the wiring, pay attention to how everything was connected—this will help with the new installation.
Step 2 – Pre-Assemble Fixture — crystal chandelier installation guide foundation
A bit of pre-assembly makes the entire process much more manageable:
Unpack your chandelier carefully and follow the manufacturer’s instructions. Some chandeliers come with hundreds of individual crystal pieces—I once helped a customer with a fixture that had over 750 crystals and took nearly 6 hours to fully assemble!
If your chandelier has a chain or rod, this is the time to thread the electrical wires through it. Be careful not to cut the wires until you’re certain about the final height—I’ve seen too many homeowners have to start over after an overeager trim.
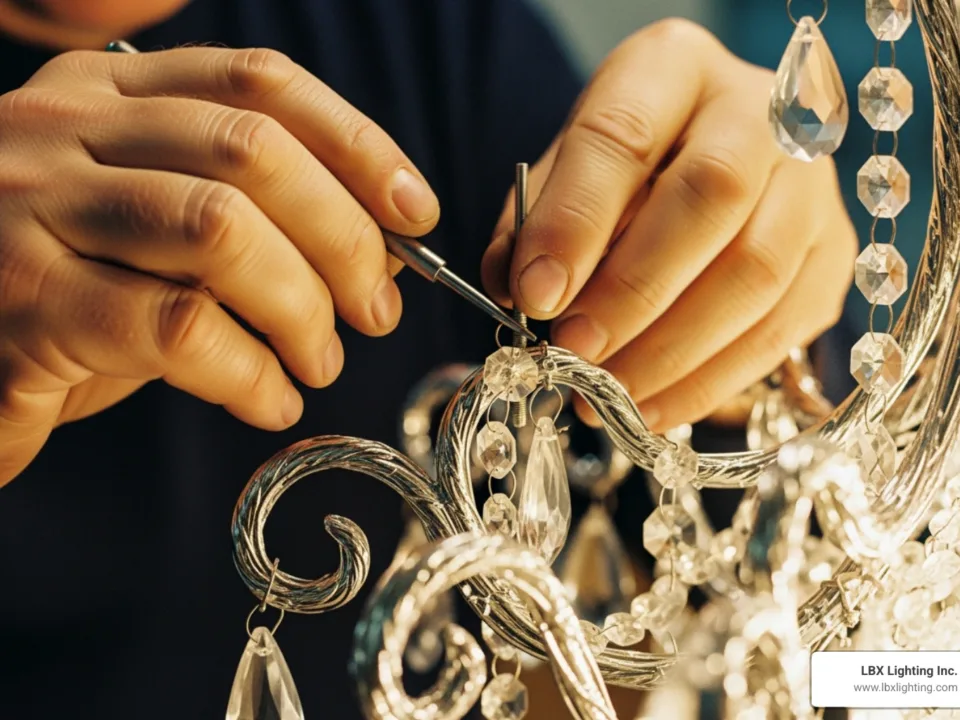
Many professionals (myself included) recommend attaching certain crystal elements before mounting, while leaving others for after the chandelier is hung. The manufacturer’s guidance will tell you which is which.
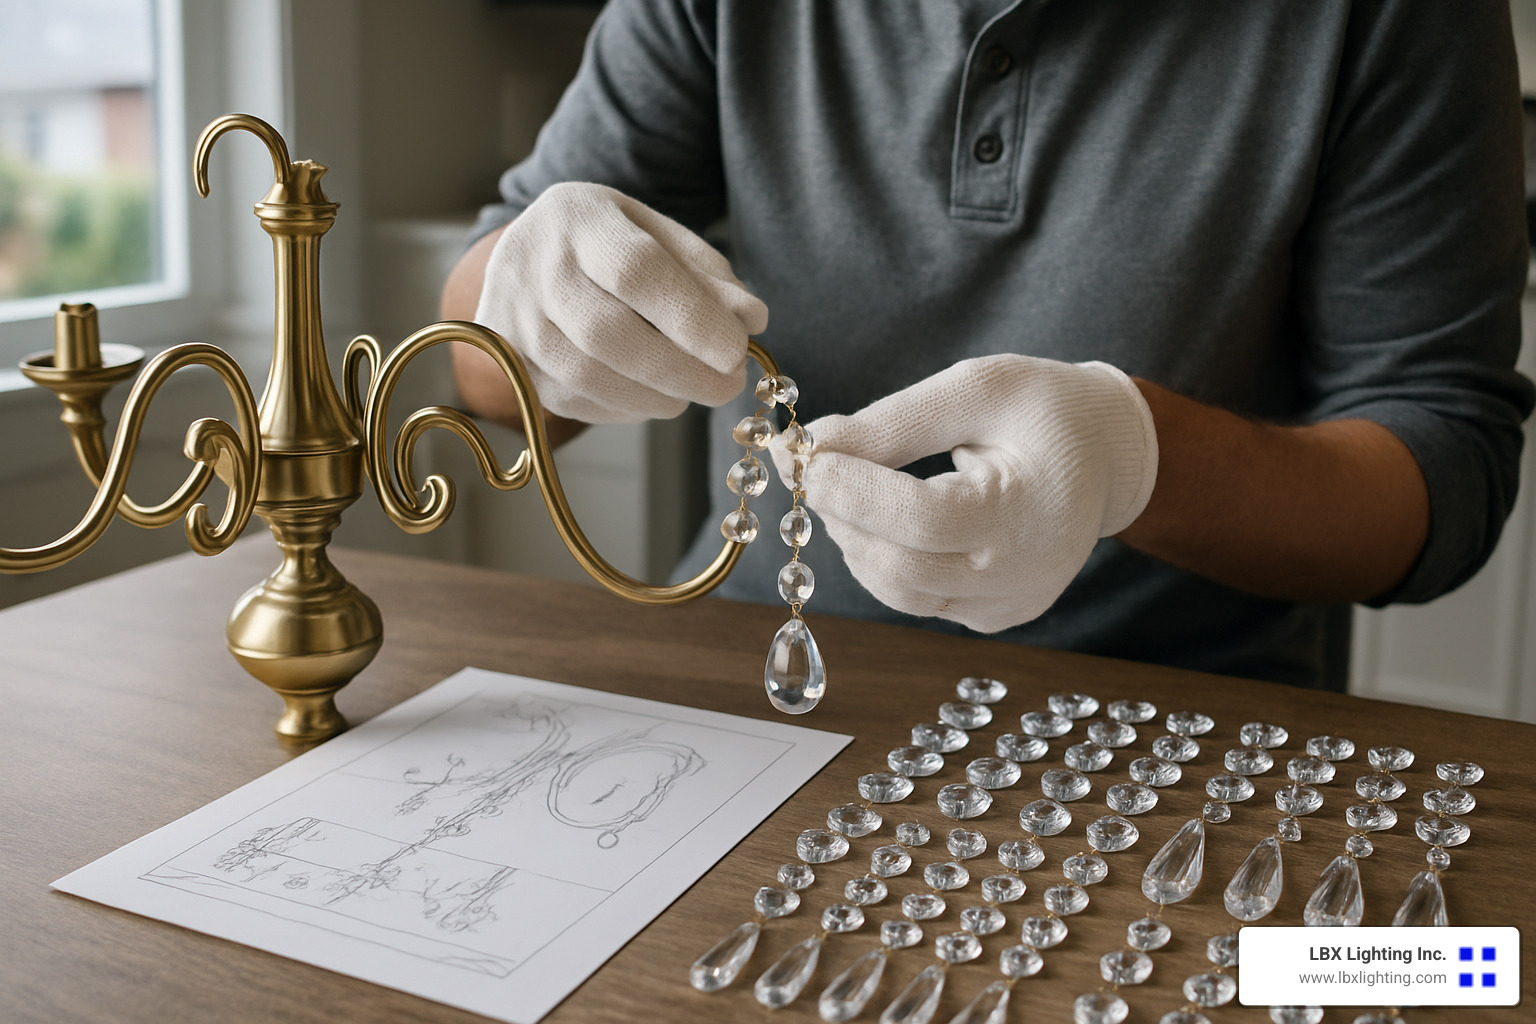
Keep those white gloves on! Whether you use the gloves included with your chandelier or clean cotton ones, they’ll prevent fingerprints that would otherwise require cleaning later.
Step 3 – Install Mounting Plate & Support Brace
The mounting system is what keeps your beautiful chandelier from becoming a disaster story:
Secure the mounting bracket to your ceiling electrical box using the screws provided. Make sure it’s snug—a wobbly bracket means a wobbly chandelier.
If your chandelier weighs more than 50 pounds (and many crystal chandeliers do), you’ll need additional support. Standard ceiling boxes typically support 50-75 pounds, but larger chandeliers require either a box rated for 100 pounds or independent support structures.
For drywall installations, toggle bolts provide extra support for your mounting plate. They spread the weight across a larger area of the ceiling.
Take a moment to use your level on the mounting bracket—a perfectly horizontal bracket means your chandelier will hang straight from the start.
Double-check all your connections before moving on. A loose screw here could mean a fallen chandelier later!
Step 4 – Hang & Adjust Chain/Cable
Getting the height right is both a science and an art:
For dining areas, aim to hang your chandelier so the bottom is 30-36 inches above the table. This provides perfect illumination without blocking conversation. In open spaces like foyers, maintain at least 7 feet of clearance from the floor.
A handy formula I share with customers: use roughly 3 inches of chain per foot of ceiling height. This gives good proportions in most rooms.
Always measure twice before cutting your chain or cable! This isn’t the place to “eyeball it”—precision matters for both safety and appearance.
Use proper chain cutters for chain links, not household tools that might damage the finish. For cable systems, follow manufacturer guidelines for adjustments.
When you’re happy with the length, secure everything with closable links. These special connectors ensure your chandelier stays put for years to come.
Step 5 – Secure Wiring — crystal chandelier installation guide safety focus
Proper electrical connections ensure your chandelier works safely:
Identify your wires correctly—match black (hot) to black, white (neutral) to white, and green or copper (ground) to ground. Getting this wrong can damage your fixture or create safety hazards.
Strip about half an inch of insulation from each wire end, being careful not to nick the copper inside.
Twist matching wires together in a clockwise direction before securing them with appropriately sized wire nuts. The connection should feel solid when you give a gentle tug.
For extra security (especially with heavier chandeliers that might vibrate), wrap each wire nut connection with electrical tape.
Carefully fold and tuck all connected wires back into the junction box. Cramming them in can damage connections, so take your time with this step.
One professional tip from our installation team: “If your chandelier has a dimmer, make sure it’s compatible with your bulb type. LED bulbs need special dimmers to avoid flickering.”
Step 6 – Final Crystals, Bulbs & Canopy
Now for the magical change:
Slide the canopy up to the ceiling and secure it with the provided screws or decorative nuts. This covers the junction box and all your wiring work.
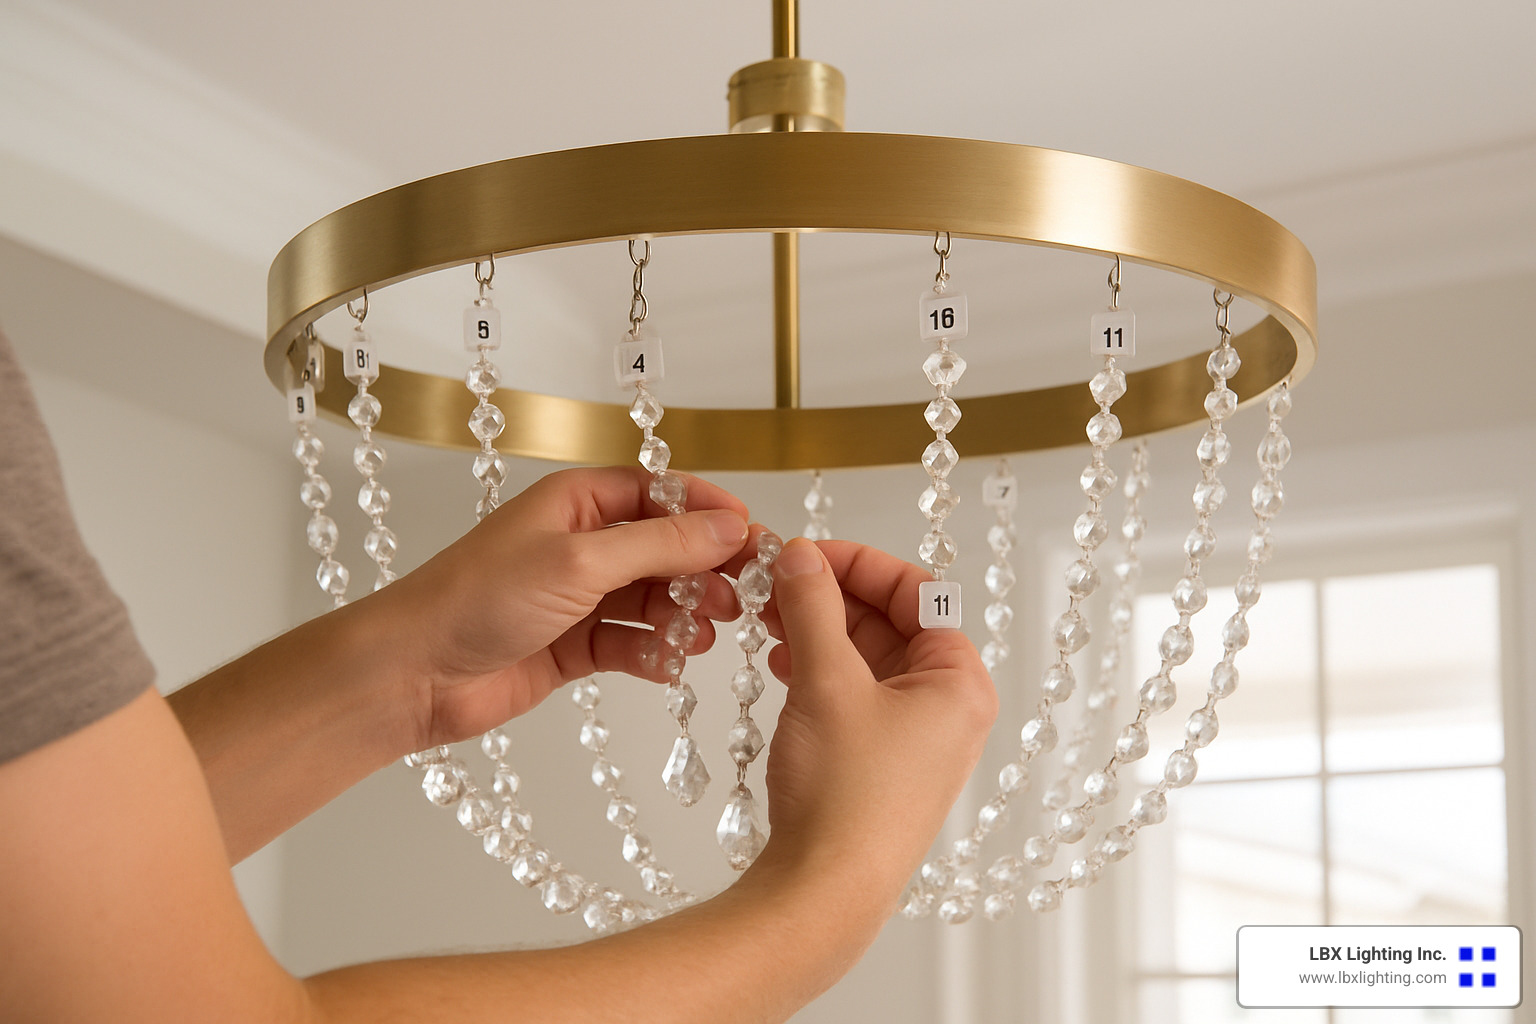
When hanging the remaining crystals, work from the inside out to avoid tangling and damage. Each crystal typically has a specific location marked in the diagram—following this pattern creates the perfect light refraction the designer intended.
Always hang crystal strands according to the numbered diagrams. These aren’t just suggestions—they’re carefully designed to create the right light pattern and visual balance.
Install the recommended bulb type and wattage. Using bulbs that are too powerful can create excess heat that damages crystals and wiring.
Consider LED options for hard-to-reach chandeliers. They mimic the warm glow of incandescent bulbs while offering years of service without replacement. At LBX Lighting, we recommend LEDs for chandeliers installed in high ceilings where changing bulbs is a major project.
Before you finish, wipe down all glass and metal surfaces to remove any fingerprints or dust accumulated during installation. This ensures your chandelier looks absolutely spectacular from the moment you first switch it on.
When you’re finished, step back and admire your work before turning the power back on. There’s nothing quite like seeing a crystal chandelier light up a room for the first time—it’s why we at LBX Lighting love what we do!
For more detailed guidance, you might want to check out this How to Mount Chandelier – Complete and Easy Guide or Home Depot’s helpful tutorial on How to Hang a Chandelier.
Finishing Touches, Maintenance & Troubleshooting
You’ve done the hard part – your beautiful chandelier is up! Now let’s make sure it stays stunning for years to come with some final adjustments and smart maintenance habits.
Ongoing Care Schedule
Your crystal chandelier will continue to impress with regular attention. I always tell my customers that dust is the enemy of sparkle! A simple weekly dusting with a soft microfiber cloth keeps those crystals gleaming between deeper cleanings.
For those biannual deep cleans (mark your calendar for spring and fall!), always turn off the power and let the fixture cool completely before you start. Safety first! When cleaning day arrives, treat your crystals gently – no harsh chemicals or abrasive materials, please. Crystal-specific cleaners work wonders for stubborn spots.
Here’s a pro tip I’ve learned after helping hundreds of homeowners: wear white cotton or microfiber gloves when handling crystals during cleaning. Nothing ruins that perfect sparkle faster than fingerprints! While you’re up there, take a moment to check all connections and make sure everything remains secure.
Changing your lighting is one of the most transformative and budget-friendly home updates you can make. With proper care, your crystal chandelier will continue making that stunning statement for decades.
Common Mistakes to Avoid
Even the most careful DIYers can make these easy-to-avoid errors. The most common mistake I see? Over-tightening crystal components. These are delicate pieces – hand-tight is plenty! Cranking down on those washers might seem helpful now, but can lead to stress fractures and cracked crystals over time.
Another critical error is skipping the ground wire connection. Even if your old fixture wasn’t grounded (many older homes weren’t), always connect the ground wire on your new chandelier. It’s a simple step that could prevent serious safety issues.
I can’t stress enough how important it is to have a helper. Even if you consider yourself pretty handy, trying to balance on a ladder while holding a heavy, fragile fixture is a recipe for disaster. Some of our larger crystal chandeliers have over 750 individual crystal pieces – that’s a lot of delicate components to manage!
Many homeowners also underestimate the time needed. What seems like a quick weekend project can easily stretch into several days with complex crystal chandeliers. Budget your time generously, especially for assembly and crystal hanging. And always, always use a voltage tester before touching any wires – safety shortcuts just aren’t worth the risk.
When to Call a Pro
There’s no shame in recognizing when a project exceeds your DIY comfort zone. In fact, it’s the smart move! If your chandelier weighs more than 50 pounds, it’s time to call in reinforcements. These heavier fixtures require special mounting considerations that go beyond standard ceiling boxes.
Ceiling height is another key factor. If you’re dealing with ceilings over 20 feet high, professional installers have the specialized equipment and training needed to work safely at those heights. No chandelier, no matter how beautiful, is worth a trip to the emergency room!
Need new wiring where none existed before? That’s definitely pro territory. The same goes for integrating your chandelier with smart home systems or special dimming setups – these complex electrical situations benefit from professional expertise.
Professional chandelier installation typically costs between $100-$350 for replacing an existing fixture, with new installations ranging from $200-$2,000 depending on complexity, height, and chandelier weight. When you consider the value of your gorgeous new fixture and your personal safety, this investment makes perfect sense.
At LBX Lighting Inc., we’re always here to help if you have questions about whether your installation is DIY-appropriate or needs professional attention. We want your crystal chandelier installation guide experience to end with both safety and stunning results!
Frequently Asked Questions
What if my electrical box isn’t rated for the weight?
This is one of the most common challenges homeowners face when installing a beautiful but substantial crystal chandelier. If you’ve fallen in love with a chandelier that exceeds your ceiling box’s weight rating, don’t worry – you have several practical solutions.
Installing a fan-rated box is your first option, as these robust boxes can support fixtures up to 70 pounds. They’re designed as direct replacements for standard boxes and provide that extra strength you need.
For heavier chandeliers, adding a ceiling fan brace might be your best bet. These ingenious devices can support up to 150 pounds and install between joists without requiring major ceiling modifications. As one of our customers shared, “A fan brace supported my 120-pound chandelier perfectly, and I didn’t even need to patch the ceiling!”
For truly substantial fixtures, mounting directly to your ceiling’s structure provides the ultimate support. This approach involves attaching a mounting plate directly to the ceiling joists, bypassing the electrical box entirely for weight support.
Safety should never be compromised when it comes to overhead fixtures. If you’re unsure about weight ratings or installation methods, our team at LBX Lighting is always happy to provide guidance specific to your home and chandelier.
How high should my chandelier hang above a table?
Finding that perfect height can make all the difference between an awkward dining experience and a beautifully lit gathering space. The sweet spot most designers recommend is 30-36 inches above your table surface.
This height strikes the perfect balance – low enough to provide warm, intimate lighting over your dining area, but high enough that it won’t block conversation or bump anyone’s head when they stand up. It also creates that magazine-worthy visual proportion that makes dining rooms look professionally designed.
If you’ve been blessed with higher ceilings (above the standard 8 feet), you can adjust accordingly. A good rule of thumb is to add about 3 inches to the hanging height for each additional foot of ceiling height. So for a 10-foot ceiling, consider hanging your chandelier 36-42 inches above the table for the most flattering proportions.
One of our designers likes to say, “Your chandelier should float like a beautiful jewel above the table – close enough to admire, but not so low it becomes an obstacle.” That’s advice we stand by at LBX Lighting!
Why are my chandelier lights flickering?
Few things are more frustrating than a flickering chandelier when you’re trying to create a warm, inviting atmosphere. If your crystal chandelier has developed an unwanted twinkle, here’s how to diagnose and solve the problem.
Loose bulbs are the most common and easiest fix – simply ensure all bulbs are firmly seated in their sockets. It’s surprising how often a slightly loose bulb is the culprit!
Check your wiring connections next. Over time, vibrations can cause wire nuts to loosen. Turn off power at the breaker, remove the canopy, and verify all connections are tight and secure.
Dimmer compatibility issues are another frequent cause of flickering. Not all bulbs work with all dimmers, and mismatched components can cause persistent flickering. As we tell our customers, “The fixture is fully dimmable when paired with compatible dimmable bulbs and a dimmer switch.” If you’ve recently changed either component, this might be your issue.
Voltage fluctuations in your home can also trigger flickering. This is more common in older homes or during peak usage times when many appliances are running simultaneously.
Finally, don’t overlook the possibility of faulty bulbs. Even new bulbs can have defects, so try replacing them one by one to identify if a particular bulb is causing the problem.
At LBX Lighting, we’ve helped countless homeowners solve their lighting challenges. If troubleshooting doesn’t resolve your flickering issue, our expert team is just a phone call away to help restore your chandelier’s steady, beautiful glow.
Conclusion
There’s something truly magical about flipping that switch and watching your newly installed crystal chandelier burst into radiant life. After all that careful work, the change of your space is absolutely worth the effort!
Throughout this crystal chandelier installation guide, we’ve covered every step to help you successfully bring elegance and sparkle to your home. While installing a chandelier does require patience and attention to detail, it’s a project many homeowners can tackle with confidence.
The beauty of a crystal chandelier isn’t just in its appearance – it’s in the atmosphere it creates. The way light dances through those crystals transforms ordinary rooms into extraordinary spaces. One homeowner told me, “I never realized how flat our dining room felt until we installed our chandelier. Now it feels like we’re dining somewhere special every night.”
Safety always comes first when working with electrical fixtures. Remember to turn off your power at the breaker (not just the switch!) and double-check with your voltage tester before touching any wires. This simple step prevents the vast majority of installation accidents.
Weight considerations are non-negotiable for chandelier safety. Your ceiling must be able to support your fixture’s full weight – and many crystal chandeliers are surprisingly heavy! If you’re installing a substantial fixture, don’t hesitate to add extra support or call in professional help.
Proper preparation makes all the difference between a frustrating experience and a smooth installation. By organizing all those crystals beforehand, reading instructions carefully, and having your tools ready, you’ll avoid the mid-project scrambles that can turn a 2-hour job into an all-day affair.
Hanging height matters for both function and style. That 30-36 inches above a dining table isn’t just an arbitrary number – it’s the sweet spot where your chandelier provides optimal light without becoming an obstacle. In open spaces, maintaining that 7-foot clearance ensures no one bumps their head while still bringing the fixture low enough to make a statement.
Secure wiring connections protect your home and family. Taking the time to match those wires correctly and secure them properly with wire nuts isn’t just about getting your chandelier to work – it’s about preventing electrical hazards for years to come.
Handle those crystals with care – preferably while wearing gloves! Not only does this prevent fingerprints, but it also protects delicate crystal pieces from oils that can dull their sparkle over time. Remember to follow the manufacturer’s sequence for attaching crystals to avoid tangles and frustration.
At LBX Lighting Inc., we’ve helped countless Houston homeowners transform their spaces with stunning crystal chandeliers. Whether you’ve followed this guide for your own DIY installation or you’re considering professional help for a particularly complex fixture, we’re here to support your lighting journey.
Our lighting experts can help you select the perfect chandelier for your space, provide additional installation guidance, or connect you with trusted professionals for more complex projects. We believe everyone deserves to enjoy the timeless elegance of crystal lighting in their home.
For more inspiration or to explore our premium crystal chandelier collection, visit our crystal chandeliers collection or stop by our Houston showroom. Our team is always ready to help you illuminate your home with confidence and style!
Now step back, look up, and enjoy that gorgeous new chandelier. You’ve earned that moment of pride – and years of sparkling illumination to come!


