Light Up Your Life with Outdoor Lighting Houston Style
July 1, 2025
Ceiling Mounted and Adjustable: LED Track Lighting Solutions You’ll Love
July 3, 2025Why Ceiling Fan Light Installation Is Easier Than You Think
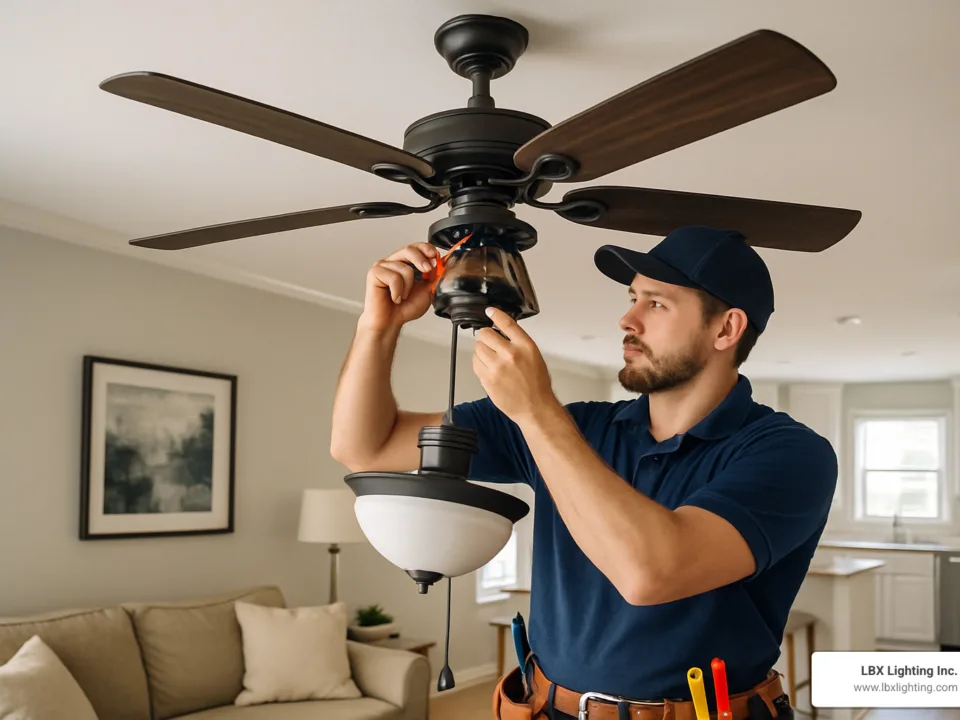
Ceiling fan light installation combines efficient air circulation with integrated lighting to create year-round comfort in your home. Most DIY enthusiasts can complete this project in 1-2 hours with basic tools and careful attention to safety.
Quick Installation Overview:
- Turn off power at circuit breaker and verify with voltage tester
- Check ceiling box – must be fan-rated for 70+ pounds
- Remove old fixture and install mounting bracket
- Assemble fan components – motor, downrod, and canopy
- Wire connections – match colors (black-to-black, white-to-white, green-to-ground)
- Attach blades and light kit using manufacturer hardware
- Test operation at all speeds and light settings
Installing a ceiling fan can reduce your reliance on air conditioning by up to 30% during summer and improve heating efficiency by 10% during winter when the fan direction is reversed. The integrated LED light kits last up to 50,000 hours, virtually eliminating bulb replacement needs.
Safety is critical – ceiling fans require fan-rated electrical boxes and proper clearances (minimum 7 feet from floor, 30 inches from walls). Always shut off power at the breaker and use a non-contact voltage tester before touching any wires.
As Michael Eftekhar with over 30 years of lighting experience at LBX Lighting, I’ve guided countless customers through successful ceiling fan light installation projects in Houston and surrounding areas.
Prep & Safety Essentials
Ceiling fan light installation requires respect for electricity and gravity. Spending 15 minutes on safety setup will save you hours of headaches later.
Power must be completely off at the circuit breaker – not just the wall switch. Circuit breakers get mislabeled, so grab a non-contact voltage tester and double-check before touching any wires.
Clearance requirements: Your ceiling fan needs at least 7 feet from floor to blade tips and 30 inches from any wall. These safety requirements prevent accidents and ensure proper operation.
All work must follow ANSI/NFPA 70 electrical codes. When unsure about code compliance, professionals like our team can help Houston homeowners steer these requirements safely.
Get a helper – ceiling fans weigh 15-35 pounds, and juggling heavy components while making electrical connections is unnecessarily risky.
For quality components in Houston, check out our guide to Ceiling Fan Lighting Stores Near Me.
Tool & Material Checklist
Essential tools: sturdy ladder, non-contact voltage tester, screwdriver set, wire strippers, adjustable wrench, pliers, drill with bits, level, and electrical tape.
Materials needed: ceiling fan with integrated light kit, fan-rated electrical box (must handle 70+ pounds), mounting bracket, appropriate downrod length, wire nuts, grounding screw, and light bulbs if needed.
Safety First: Power & Ladder Setup
Electrical safety starts at the breaker box. Turn off power, label that breaker with tape, flip wall switches to “off”, and test wires with your voltage tester.
Ladder safety: Use a sturdy ladder on level ground with your helper holding it steady. Wear safety glasses and work gloves. Never rush – take your time and move the ladder rather than stretching to reach something.
Box Rating Check, Fixture Removal & Mounting Bracket
Many DIY ceiling fan light installation projects fail because of wrong electrical boxes. Standard light fixture boxes cannot handle the dynamic forces of a spinning fan.
Your ceiling fan needs a box rated for fan support and at least 70 pounds of weight. Look for clear markings saying “Acceptable for Fan Support” or showing weight ratings.
For sloped ceilings over 34 degrees, you’ll need a special angled mounting adapter: Print our angled ceiling mount guide.
Is Your Junction Box Fan-Ready?
Check for box stamps – manufacturers mark fan-rated boxes clearly. No stamp usually means no fan support. Do the wiggle test – a properly mounted fan-rated box should feel absolutely solid.
If your box fails these tests, you’ll need to install an adjustable brace that spans between ceiling joists, then mount a new fan-rated box to that brace.
Removing the Existing Light or Fan
Start with bulb removal, then glass shades or covers. Have your helper support the fixture while you unscrew the canopy. Use your voltage tester again before touching wires, then carefully disconnect wire nuts and cap wires immediately.
Take a photo of wire connections before disconnecting – this saves confusion later. Recycle old fixture components at your local facility.
Ceiling Fan Light Installation: Assembly, Wiring, Mounting
Modern ceiling fans use clever engineering like ball-and-socket mounting systems that let the fan hang safely while you work on wiring. The basic process: assemble motor and downrod, make electrical connections, then add blades and light kit.
Assemble Motor, Downrod & Canopy
Threading the wires first is critical – pull all motor wires up through the downrod before making connections. The collar pin and safety clip system connects the downrod to motor housing and prevents loosening over time.
Downrod length affects performance: standard 8-foot ceilings work with short downrods, 9-foot ceilings need 12-inch downrods, higher ceilings need longer rods for proper clearance.
Wiring Scenarios: Single Switch, Dual Switch, Remote Control
Wire colors: Black wires control the fan motor, blue wires control the light, white wires are neutral, green or bare copper are ground.
Single switch installations: Connect both black and blue fan wires to your house’s black wire. Dual switch setups require 14-3 cable – black controls fan, red controls light.
Remote control systems include a receiver module that mounts in the canopy. House wires connect to receiver inputs, fan wires to outputs. DIP switch programming pairs your remote with the receiver.
Need help with wire stripping? How Do I Strip a Wire?
Grounding is non-negotiable – connect all ground wires together and to the box’s grounding screw.
Mount Blades & Attach Light Kit
Blade attachment uses either separate brackets or direct attachment systems. Tighten screws firmly but don’t over-tighten – this can strip threads or crack mounting holes.
Blade balancing might be necessary. Use the included blade balancing kit if you notice wobbling at medium speed.
LED light kit installation now uses quick-connect plug systems – simply plug the connector into the motor housing. Modern LED integrated systems last 50,000 hours, eliminating frequent bulb changes.
Testing, Troubleshooting & Maintenance Tips
Start with a visual inspection while power is off. Double-check all wire connections are snug with no bare copper showing. Restore power at the circuit breaker first, test lights before starting the fan, then gradually work through fan speeds.
Motors need a break-in period – some noise during the first day is normal. However, grinding sounds, excessive wobbling, or sparking need immediate attention.
Ceiling fans have seasonal directions: counterclockwise for summer cooling, clockwise for winter circulation. LED lights typically last 50,000 hours – nearly six years of continuous operation.
For ongoing maintenance in Houston, our team at Ceiling Fan Repair Houston has you covered.
Common Issues & Quick Fixes
When fans won’t start: Check circuit breaker, wall switch position, pull chain positions, and remote batteries.
Wobbling: Tighten all screws first. If wobbling persists, use the blade balancing kit – attach clips to different blade edges until wobble disappears.
Noise issues: Often stem from loose components or break-in period. Grinding usually means shipping blocks are still installed.
Remote control problems: Replace batteries first, then re-pair by turning power off for ten seconds, restoring it, and pressing the pairing button.
When to Call a Pro
New electrical circuits, aluminum wiring, cathedral ceilings, and homes lacking proper grounding require professional expertise. Commercial installations almost always need licensed electricians.
At LBX Lighting, we handle complex Ceiling Fan Installation Houston projects beyond typical DIY scope. Professional installation typically costs $150-300 – reasonable insurance against safety hazards.
Trust your instincts – if something feels beyond your comfort zone, it probably is. We provide ongoing Electrician Fan Repair services to keep your investment running smoothly.
Frequently Asked Questions about Ceiling Fan Light Installation
Do I really need a fan-rated electrical box?
Yes, absolutely. Regular light fixture boxes handle static weight only. Ceiling fans create dynamic loads from spinning and vibration that quickly stress standard boxes beyond limits. We’ve seen fans crash down when people cut corners – the box fails after weeks or months.
Fan-rated boxes are engineered differently – built to handle 70+ pounds plus dynamic forces. They mount more securely and use heavier materials. The cost difference is usually under $20 compared to potential property damage.
How do I wire a fan and light to separate switches?
You’ll need 14-3 cable with black, red, white, and ground wires. Black controls the fan motor, red controls the light kit. At the switch box, connect incoming hot to both switches with a jumper wire. At the fan, connect black fan wire to black house wire, blue light wire to red house wire, white to white, grounds together.
What clearance do I need on a sloped ceiling?
Basic clearance rules still apply – 7 feet from floor to blade tips, 30 inches from walls. Measure from the lowest point where someone might walk. For slopes steeper than 34 degrees, you need special angled mounting hardware to ensure the fan hangs level.
Conclusion
Congratulations! Your ceiling fan light installation will provide comfort and energy savings for years. You’re looking at up to 30% savings on summer cooling costs and 10% improvement in winter heating efficiency. Those LED lights will shine for up to 50,000 hours – roughly 20 years of normal use.
Your success came from the fundamentals: shutting off power and testing it, using a fan-rated electrical box, careful wiring connections, and proper assembly. These aren’t suggestions – they’re the difference between success and frustration.
At LBX Lighting Inc., we’ve helped Houston-area homeowners with lighting solutions for over 30 years. We love DIY success stories, but we’re here when you need professional backup. For expert help, our comprehensive Electrician Fan Repair services ensure your investment stays protected.
Remember to test your fan’s seasonal direction switch – counterclockwise for summer cooling, clockwise for winter circulation. Your new ceiling fan represents improved comfort, lower energy bills, and the satisfaction of a job well done!


